What To Do With Your Old, Unwanted T Shirts

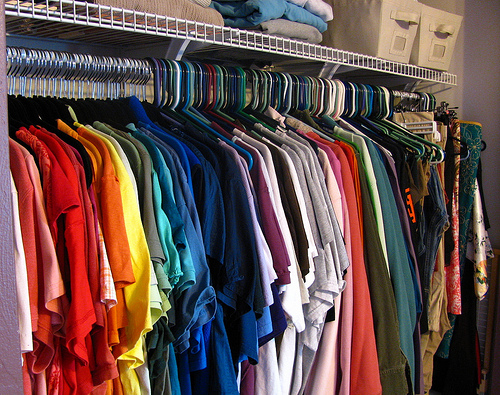
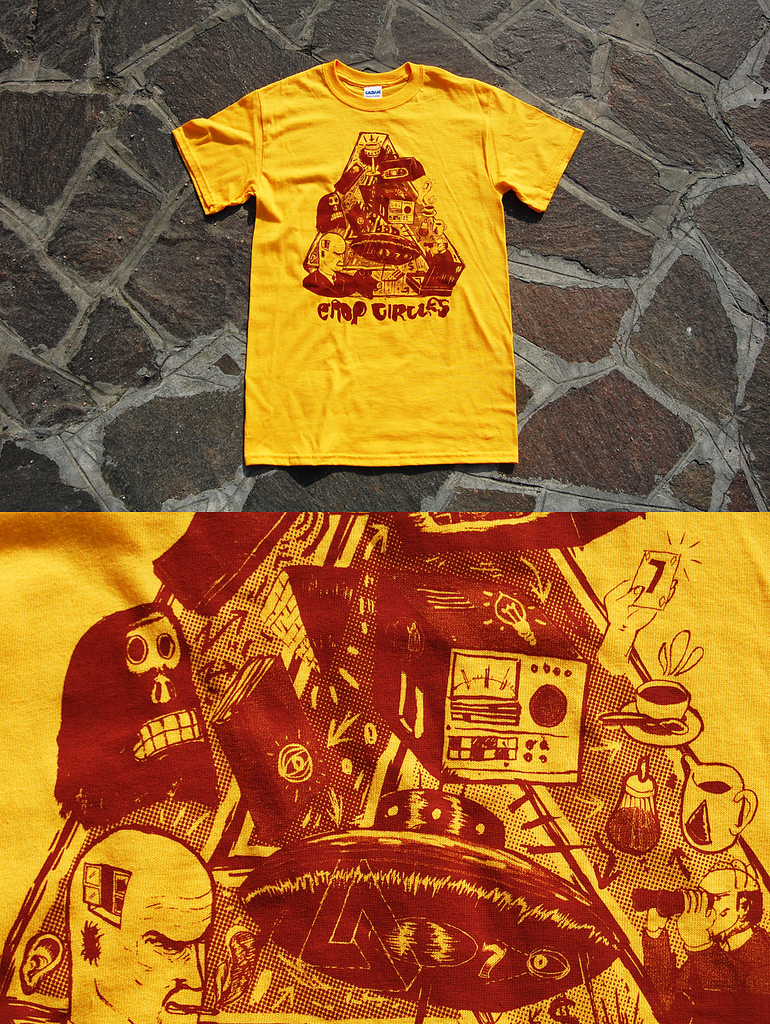
Today’s post is about what to do with your old, unwanted t shirts to make room for all the new shirts that you want to buy. When you need to get rid of your clothes there are many options available to recycle t shirts. You could find a new use for them, upcycle them into something new, or maybe even donate them.

Donations

If the old t shirts you want to get rid of are in good to great condition, then you may want to consider donating them. There are many organizations and charities that collect clothing to give to those who may not be able to afford new clothes, or maybe even unable to afford old clothes. Knowing that your donation is helping someone else, who otherwise may not have been able to get usable clothing, is a great feeling and I highly recommend this method of recycling t shirts.clothing donation box

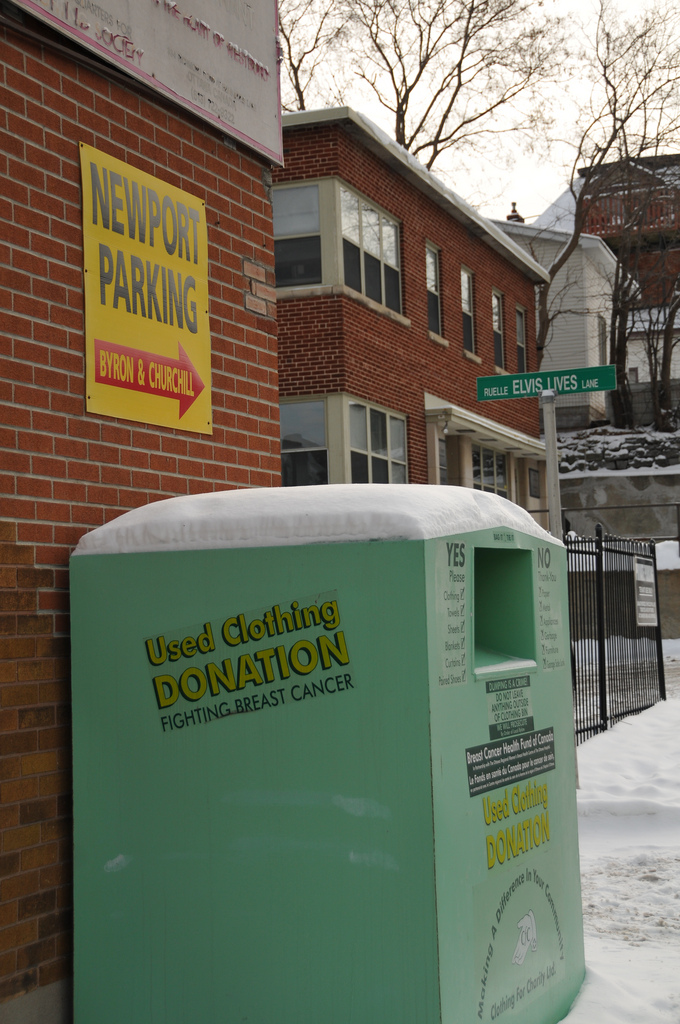
Here are some suggestions of places where you can donate:

ClothingDonations.org

Salvation Army for the USA Eastern Territory

Pick Up Please

Planet Aid

Dress For Success: Support and Donate Clothing

Also, check your local area for people and places that are accepting clothing donations.

Upcycling

Upcycling is taking something you don’t really want or need anymore and turning it into something else. I suggest upcycling for old t shirts that are in good condition that you just can’t seem to give up. You don’t need them anymore and you want to get rid of them, but there is some attachment or memory with the t shirt that prevents you from actually giving it up.

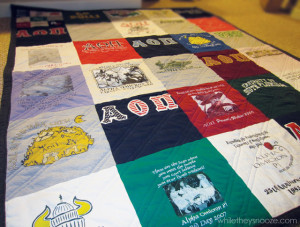
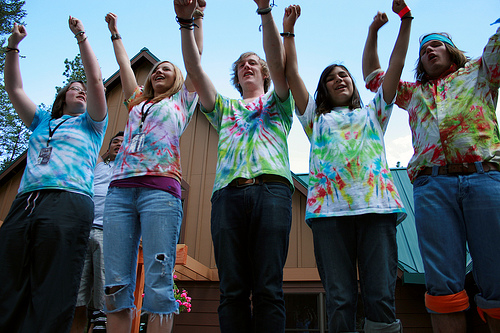
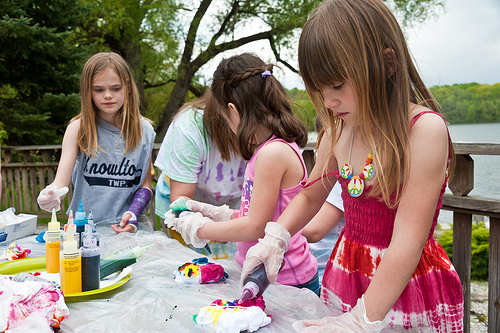
If you have a lot of t shirts that you can’t give up, one suggestion is making a t shirt quilt. If you want to learn more about t shirt quilts check out my blog post titled How To Create T Shirt Quilts. You could also make pillows or even art work with your old t shirts. I’ve seen quite a few people who have folded, or cut the design out of, a t shirt, framed it and hung it on their walls. These are all great ways to preserve the memories that go along with a t shirt, without taking up all of your closet and drawer space.

Rags

For your t shirts that are not in good condition, full of rips and holes, covered in stained shirtstains, and are just unusable and unwearable, there are not many t shirt recycling options available. When I have an item of clothing in very poor condition, it then becomes a rag. I use it to clean up messes, dry my car, my father uses them when changing the oil in my car, they are dirty rags. Since these rags are re-usable, it’s a better option then using a bunch of paper towels that are going to be thrown away, less waste going into landfills is always a good option. Once my rags are just done though, that is when they go in the trash, which is the only other option for your unusable t shirts. If a shirt is unusable there is nothing that can really be done with them and they have to go.

I hope that this blog post helps you with your t shirt recycling needs. If there are any options I missed please let me know! I’m always interested in learning new things to do with my old clothes.

15 Inspirational Quotes Related to Design

Hello readers! When creating a design, sometimes we need motivation or maybe you’ve hit a wall and need some inspiration to assist you in getting through that block. During these times you can find inspiration from your peers, your predecessors, maybe even your design idols. Saul Bass is my design idol. Being a famous logo designer, he as always inspired me when working with clients to create that perfect design for them.

Here are some inspirational quotes that are all connected to design. I hope that these design quotes will inspire, motivate, or maybe even assist you as a designer, during the slumps or as you work your way up.

I made the inspirational design quotes images shown below with quozio.com and I hope you enjoy them.

Create-your-own-visual A-designer-knows-he-has Truly-elegant-design You-cant-do-betterSymbolize-and-summarize  Inspiration-exists-but

If-design-isntPractice-safe-design-UseI-never-design-a   Good-design-is-a-lot Good-design-is-all-about Dont-think-Thinking-is Design-is-thinking-made

If-youre-not-failing

Design-is-in-everything

I hope that you enjoyed these inspirational design quotes! If I missed your favorite design quote then please share it with me. Until next time!!


How to Create T Shirt Quilts

We all have those t shirts that we just can’t get rid of. They may be old, ratty or don’t fit anymore but we hold onto them because we like them or they have memories attached to them. I have an old high school shirt, and shirts that friends and I made when we were teenagers, that I just can’t seem to let go. My aunt recently suggested making a t shirt quilt with them, which I thought was a great idea! Making t shirt quilts is a great way turn those t shirts into a memory keepsake, that will create space in your dresser drawers.

closet of t shirtsWhat You Need

First thing you need is a sewing machine, or a needle to sew with if you are able to sew by hand. Also grab all the t shirts you want to use in the quilt, or quilts if you have a lot of t shirts. Other materials you’ll need are interfacing, batting, thread and cotton fabric.

Interfacing will be used on the backside of the t shirt parts of the quilt to make it more rigid and to make the t shirt fabric non-stretchy to make it easier to sew. You’ll want to look for a lightweight, fusible interfacing. Batting is what will go on the inside of the quilt, it’s like a solid layer of the stuffing used in pillows. It’s easier to work with and you don’t have to worry about it clumping in areas like in home-made pillows. The cotton fabric will be used to make the back of the quilt, if you’re not making reversible t shirt quilts, as well as for the quilt border. It can also be used in sashing, which is using strips of fabric in-between all of the t shirts, kind like a frame for them.

If you’re unsure what to get or how much to get, ask someone at a local fabric store. They know a lot about the products in their store and what would work best for your projects.

How To Make T Shirt Quilts

The first thing you have to do is create the blocks that will be sewn together. There are many patterns available online that you can use to create a variety of blocks using your t shirts and cotton fabric, or you can just us the t shirts. For just using t shirts, cut the t shirts into equal sized squares, or just into square or rectangular shapes to make a less uniform looking quilt.

After cutting out the blocks, decide the placement of your t shirts and pin together where you are going to sew. When you start sewing, start by creating horizontal or vertical rows first. After creating all of the rows, sew the rows together and add the border, if you choose to do so.

Now it’s time to finish the quilt! To add the back to the quilt, we have to layer the pieces and then sew them together. First take the t shirt part we just made lay it right side UP, so the side with the t shirt patterns faces up. Then take the fabric for the back of the quilt and put it on top of the t shirt side, except put this piece face DOWN. The the right sides should be facing each other. The take the batting and put it on top of the two pieces. Sew three of the four sides, then trim the batting close to the seams you just sewed, but do NOT trim any fabric. Then you take the quilt and turn it right side out and sew the last side. Your quilt is now ready to enjoy!

tshirt_Quilt1

T Shirt Quilt from tutorial on whiletheysnooze.blogspot.com

Making t shirt quilts is a great way to create a keepsake that you can use, out of t shirts you can’t seem to get rid of that take up all the space in your closet. I’d love to know how your t shirt quilts came out! Send me pictures or tell me about them.

Here are some other resources to help you with your t shirt quilts:

Learn How to Make Quilt Backing

DIY Basic T-SHIRT QUILT Tutorial- Part 1

Basic T-Shirt Quilt Instructions

How to make T-shirt quilts pg 1 of 5

How to Make a T-Shirt Quilt

Happy quilting!

Drawing a Blank – Tips to Help You Get Inspired

It happens to all of us, our mind just goes blank, you’ve hit a block. It happens when writing stories, essays, even blog posts. It happens when creating, or before the creative process can begin. When your drawing a blank, what you need is some inspiration to get the gears to start turning and the creative juices flowing.

What is the Block I’ve hit?

A “Block” is when you’ve become unable to access your once flowing stream of inspiration, whether for writing, drawing, music, or other things. This would happen to me in school a lot, for pieces of art and even essays for other topics. When writing a history paper I would never know where or how to start it, but once you figure that out it all just starts to flow and come together into a great piece. There can be many causes for a mental block. From just a depletion of creative energy, perhaps after an intense project, to personal or emotional issues that arise in your life. Just remember that it is temporary, and thought it feels like an eternity, your blank mind will be filled with ideas soon, perhaps with just a little inspiration.

mental block

How To Get Inspired

Everyone is inspired in different ways, by different things. You’ll have to experiment to see what works best for you, or maybe branch out and try something new to get inspired. Here are some different ways of finding inspiration:

  • Go Out – Staring at whatever it is your trying to create is not going to inspire you, probably just cause frustration from your blank mind. Go outside and walk around, you can see, hear and smell many different things. These experiences engage the senses, gets you thinking, and inspires your mind.
  • Do Something Unrelated – Again, staring at it is doing you no good. Leave your workroom/studio/computer and do something else. Go into your kitchen and bake something, plant some herbs or flowers, read a book or go to the book store and browse. If all you do is think and focus on writing or painting, your going to burn out and start drawing a blank.
  • Explore Online – You can find anything and everything on the Internet. You can just browse pictures and articles as you find them, or start researching a topic that interests you, or research something related to a piece. Once in college I had to create an original logo for a tea company. Well, I had no idea where to start, and with so many different tea companies out there an original design was proving difficult. So, I started researching tea. What is tea, how is tea made, everything and anything about tea, and it inspired a great design.
  • Listen to Music – Listen to your favorite CD, artists, or play list. Relax your mind and just listen to the music, don’t even think about that project waiting for you. Inspiration could come from a melody, a lyric or even just the beat of a song.
  • Jot Down Random Things – Just start writing or doodling whatever. Random phrases come to mind, write them down. Go back and look at them, is there anything you can build on? Have an itch to draw but feel uninspired, just start doodling, start creating lines and shapes and see where it goes. You could very well just be over thinking the project your working on, causing a block. Do something simple and basic and see if you can get those creative juices to start flowing again.

writing

I hope that these how to get inspired tips help you with finding inspiration for your projects. Heck, I even used some of these tips myself to inspire this blog post. I’d love to know what you do to get inspired or work through a block.

Here are some other pages on finding inspiration and creative blocks:

9 tips to be more creative@pikaland writes about inspiring creativity.

How to Overcome Artist Creative Block and Get Inspired – A post on the @artpromotivate website with tips to help get inspired.

10 Tips to Avoid a Creative Block – A post on the @inspiredmag website with some tips to inspire you and avoid hitting a creative block

Top artists reveal how to find creative inspiration – Artists from a variety of different careers discuss how they get inspired.

How to Get Creatively Inspired – a post by Jacob Gube on the @designinstruct website that gives some more tips for finding inspiration.

Where to find creative inspiration? – A post with some interesting and creative tips to help get your creative juices flowing, from @inkbotdesign


How to Design Custom T Shirts

Are you looking to create custom t shirts but have no idea where to start in designing one? Today I’m going to go over some t shirt design tips and design ideas to help you create custom apparel for maybe your baseball team, your family reunion, or maybe just for fun. Custom t shirts are a great for setting your group apart or just showing off your creativity.

Creating a Design

When designing t shirts, first you need to create and decide on a design. The design could be a logo, or maybe a team name. Many custom t shirt websites will have some pre-loaded images or fonts for you to use, but if you want to create an original t shirt design here are some tips and techniques to make the most out of your design.

  • Keep it simple – you want to get the point across without the design being overwhelming to the viewer. Stay focused on the purpose of the shirt and remember that less is more.
  • Avoid Color Overload – Try not to use to many different colors. Using to many colors could be distracting, or once again overwhelming. Try to stick to only using 2-4 colors, you could even use multiple shades of the same color to get get some contrast and variation in your design.
  • Simple Fonts – Just like with images, you want to keep your letters simple and easy to read. You can have a custom and creative font but if no one can read it then it fails in its purpose.
  • Limit Text – A little bit of text is great, maybe a quote, a team or company name, or perhaps a slogan. But if you write a lot of text on a t shirt then people glancing at it won’t be able to get the full affect of the t shirt. Your shirt needs to get the point across in a single glance.

colors

Design Ideas

Are you stumped on a design for your custom t shirt? Here are some strategies for coming up with that perfect design idea. First think of the purpose of the t shirt. When you think of it what are the first things that come to mind. For example, for a family reunion you may think of a family tree, which could lead to an interesting tree based design. Your next step in coming up with t shirt design ideas would be research. What are other, similar groups or events doing for their t shirts? Maybe look into the history or read articles on topics similar to the purpose of your design, see if it sparks some design ideas. Instead of boring, plain stars on your astronomy club’s t shirt, have a super nova or a black hole. Be creative and think outside of the box.

Custom T Shirt Design Tips

Now that you have a design it’s time to create a custom t shirt. First you have to decide what kind of shirt you would like to have. There are polos, v necks, crew necks, and many more. After you’ve chosen the best style of shirt for your t shirt design, you now must choose what color the shirt will be. Try to find a color that looks good with the design that you created. Try to avoid shirts that are similar to the colors in your design. For example if your design has primarily dark red in it, then you may want to avoid shirts where the design will be surrounded by dark red because the design will blend in with the shirt. You want your design to stand out so people take notice of it. You’ll also need to choose where your design will go on the shirt. Will it be in an upper or lower corner of the shirt, or maybe on the sleeve, on the stomach?

t shirt with design

Custom t shirts can be useful for many different things in many different ways. A custom t shirt design will set you all apart, make you more unified and easy to recognize, for maybe your softball team, business or family trip. I’d love to hear your t shirt design ideas or see custom t shirts you’ve made!

For more tips or to spark a design idea, check out these articles and blog posts:

12 Best T-Shirt Design Tutorials and Tips Editor at @SloDive has compiled the great list of Photoshop and Illustrator tutorials

5 Secrets For Perfect T Shirt Text Author John P Harrishas some great tips and information regarding text desgin.

How to design custom T-shirt– Michael Garmahis @garmahis has created a useful list of tips for creating a custom design t shirt

10 pro-tips for T-shirt design @CreativeBloQ has a list of great tips and visuals to help create your perfect design

Have fun designing!

How to Iron T Shirts and Other Apparel – Proper Laundry Care

So I recently learned that there are a lot of people out there who don’t know how to properly care for their clothes. This is going to be the first in a series of posts that will discuss proper laundry care. This blog post will discuss ironing and how to iron clothes, a task that can seem a bit scary for those who have never ironed before. You are wielding a hot piece of metal that could potentially burn you or your clothes, so it’s understandable if ironing clothes makes you nervous. After watching the scene in the movie Pleansantvillewhere one of the men shows an iron shaped scorch mark on the back of his shirt, it made me nervous about scorching my clothes as well.

What You Need

If you have clothes that need to ironed, there are a small number of items that you need. The first thing is you need a clean iron. Make sure that it’s free of rust or anything burnt that could be sticking to it, like starch if it’s used while ironing. If the iron is not clean it could ruin your clothes. You’ll also want to invest in an ironing board. You don’t want to use furniture because it could be dirty, the iron could possibly ruin it, or worse potentially start a fire. Ironing boards are designed with a material that is flame retardant and that’s breathable so steam is able to escape while ironing. You can buy stand up ironing boards, or ones that you can lay flat on a table or the floor. If your iron doesn’t come with a steamer then you will want to buy a small, cheap spray bottle and fill it with some water. The last thing you may need is some starch, but that only if you like to use it. It’s not a necessary item for ironing, I don’t ever use it.

iron and board

Get to Know Your Iron

Before you ever try to use your iron, the first thing you should do is read the instructions and get to know your iron. Every iron is different, from the settings, to how it works, so read the instructions! Check and see if your iron comes with a steamer, and how to get the steamer to work. Learn how to change the intensity of the heat, and what setting they recommend for a certain type of fabric. My iron has settings 1-10, my friend’s iron has 1-7. Mine you have to manually turn a huge knob on the body of the iron to the proper heat setting, on her iron it’s a small dial on the handle. Every iron is different!

iron settings

Using the Iron

Here are some general how to iron tips and techniques, Before you turn on your iron, figure out what type of fabric you will be working with, is it cotton, maybe polyester? Different fabrics have different suggested settings that will work best for that fabric. Once your iron is plugged in, if it needs to be plugged in, and you’ve put it on the proper setting, you now need to wait for the iron to heat up. While the iron is heating up or not in use, balance it on it’s flat, back end. NEVER lay the iron down flat on the metal side while it’s turned on. That is how things get burned, or how a fire gets started. Also make sure there is nothing hanging close to the hot metal, it could melt and/or catch fire.

When it’s time to start ironing, first spray a little bit of water, just a spritz or two, on the clothes you will be ironing. This water will steam, which is good! When you start ironing, keep the iron moving at all times. Don’t lay it down on the garment and let it sit there because it will burn, or scorch, your clothes. Just slowly lay the sides of the garment flat and move the iron across in small strokes and flatten out any wrinkles. The heat, steam and movement of the iron will flatten out wrinkles and put everything in it’s place.

Certain items have certain ways they need to be ironed, or pressed. There are clothes with creases that need to be kept, or items that need to be ironed in a certain direction, like top to bottom. Here are some resources to help you learn how to iron your clothes, so that they look clean and wrinkle free.

Good luck in your future ironing endeavors, and remember, if used properly you have nothing to fear of your iron or ironing clothes. Until next time!


How To Make Tie Dye Shirts, And Other Things Too

Hey everyone! Today is all about tie dye. Tie dye has been a summer tradition for as long as I can remember. We used to have tie dye day at camp, I had a t shirt tie dye birthday party once, it’s just a lot of fun to make and wear for kids, as well as adults. Check out our kid’s t shirts to find the perfect tie dye t shirts.

What Is Tie Dye?

Tie dye is a process of tying a piece of fabric and dying it, typically with bright colors. Hence the name tie dye. The tie dye we all know today is the modern use of the traditional dying methods used in many cultures over the course of many centuries. The t shirt tie-dye that we know today came about in the late 1960s.

What Can I Tie Dye?

I think an easier question is what can’t I tie dye. If it’s a fabric or cloth you can most likely tie dye it. The most popular tie dye item would be tie dye t shirts. Other common items are pants, socks, towels, sheets, scarves, dresses, and much more! I personally am fond of the tie dye sheets I made for my college dormitory my junior year. Everyone was jealous of my awesome tie dye sheets. If you have a flat laying top sheet you could even hang it on the wall as a really cool tie dye mural or decoration.

Tie Dye Group

Tie Dye Techniques

There are many tie dye techniques and kits available for tie dying today. Whichever kit or instructions you’re following, make sure you follow them exactly. When you’re ready to start your tie-dye project, consider using Comfort Colors t-shirts, which are perfect for creating vibrant and long-lasting designs. Trying to re-create the results of one method with the supplies or techniques of another could ruin the whole process and the t shirt tie dye may not work.

Generally, the first thing you have to do is, using ties or rubber bands, fold the garment. There are many different techniques for folding fabric. There are knots, spirals, rolling, bunching and many many more. Depending on the method you’re following, after folding you may need to have the garment soak in water or some sort of solution. There are kits though that are able to dye a dry garment.

Now you color! The more traditional methods use dye baths to color the apparel. You immerse the clothing item in the lightest color, rinse and then repeat with a darker color, rinse and repeat with an even darker color, etc…. More modern methods and kits will have you put the dye in a small squirt bottle and have you squirt the color dyes onto, and into, the fabric. After dying some techniques will have you rinse the garment to get rid of excess dye, though others will not require this.

Tie Dying

To get the dye to stay permanent and vibrant, you must wash it correctly. Follow the instructions that go with the tie dye technique you’ve chosen. Do NOT wash with any other garments, excess dye will be coming off the shirt and will dye any other garments in the wash with the tie dyed items.

I hope that this post helps you with your tie dying needs! Tie dye can be a great activity for families or groups, and both kids and adults will enjoy creating an original tie dye t shirt to wear and show off. I’d love to hear about any of your tie dye adventures, or maybe a new technique that I haven’t heard of.

For some more information on tie dye and tie dye techniques check out these pages:

Tie Dye Instructions

History of Tie-Dye

Tie-Dye Wiki

Folding Techniques

Tie Dye Your Summer

Tie Dying Techniques

Urban Outfitters Tie Dye Techniques

Fashion of the 1970s – Vintage Apparel Style Guide

While going through some of my grandmother’s old photo albums I came across pictures of my mother as a teenager in the 70s wearing, the now vintage, style of the decade. I went to question my mother who tried to take and hide the album while explaining that it was the style then. It prompted me to look more into 70s fashion and trends.

Tops

In the 70s, men wore solid colored shirts, as well as shirt with loud prints, that usually had long and pointed collars. The printed shirts were very often paired with leisure suits. These leisure suits came in a large variety of colors, some of these colors should never been seen again. In women’s fashion, halter tops and tube tops became popular, as well as some continued use of the loose fitting peasant tops that became popular during the 1960s.

Bottoms

Bell bottoms is a vintage style that continued from the 60s that were still popular throughout the 70s for both men and women. But for the women, there were now hip hugger jeans. These jeans sat a couple of inches below the normal pant waistline and were very often extremely tight. Women were know to decorate the denim pants with studs, or rhinestones, and some even bleached the pants to change the color or create patterns. Hot pants also came into style. These were very short and very tight shorts that left very little to the imagination, kind of like the shorts girls where today only with a higher waistline. Women also now had three skirt lengths to choose from, mini, midi and maxi. In regards to men, the only trend I could find was their pants got tighter, so not much going on there.

wiki girl in mini

A girl in Kensington wearing a mini skirt from Wikipedia

Shoes

Platform shoes, which had two to four inch soles became popular for both men and women in 70s fashion, particularly for those who dressed in the Glam Rock style. While being extremely popular, they were responsible for many injuries since they were instable and not really practical for dancing at the disco. Other shoe trends were Cork Ease shoes, flip flops, clogs and disco shoes that would match your glittering, tight-fitting disco outfit.

Hair and Makeup

For most of the 70s women wore their hair long, much like in the 60s though other popular hairstyles emerged, and rather quickly. Some of these hairstyles include the afro, feathered hair, and shaggy hair. Men’s hair was typically worn long, and was often styled in layers. Tousled hair and sideburns also became popular in the earlier half of the decade. For make-up, unlike many past and future trends, women went for a more natural look. Their goal was to look like they weren’t wearing any make-up.

Girl With FlowersStyles and trends are constantly coming and going. There are trends that last a year, styles that define a group of people and then there are the trends that define a decade. Like many of the decades in the 20th century, the 1970s had distinct styles and trends that defined it. Some of these have resurfaced as vintage apparel from time to time, others my mother tries to forget but I’m not letting her off the hook that easily.

Here are some other resources to look at if you want to learn more about styles and trends of the 1970s:

1970s in fashion – Wiki page on the styles and trends of the 1970s

Fashion Blog Life – 70s Fashion – The 70s Fashion page of the Fashion Blog Life website is informative of many of the trends from the period.

Top 10 fashion trends of the 70s Christina Pinto, writer for @topyaps, has created a list of fashionable 70s trends that have also re-emerged today.

Classic70s – 70s Fashion This page on the Classic70s website has a great overview of the fashion of the time period

Retrowow -70s Fashion – Author of @retrowow has made a very informative page about fashions of the 1970s