World Design Day: Custom Tee for your Business

World Design Day

With World Design Day igniting creativity across the globe, there’s no better time to craft the perfect shirt for your business. In a world where the first impression is often the last, a uniquely designed custom tee can set your brand apart, convey your company’s ethos, and establish a lasting connection with your audience.

Custom Tee

When embarking on creating a unique custom polo shirt design, it’s crucial to consider the message you want to relay. Your apparel is not just a piece of fabric; it’s a communication tool. Do you want to evoke professionalism? Perhaps a sense of approachability? Or maybe your brand is all about bold innovation? The design you choose will speak volumes before a word is even uttered.

Embroidery Services Explained

World design day custom tee embroidery inspiration

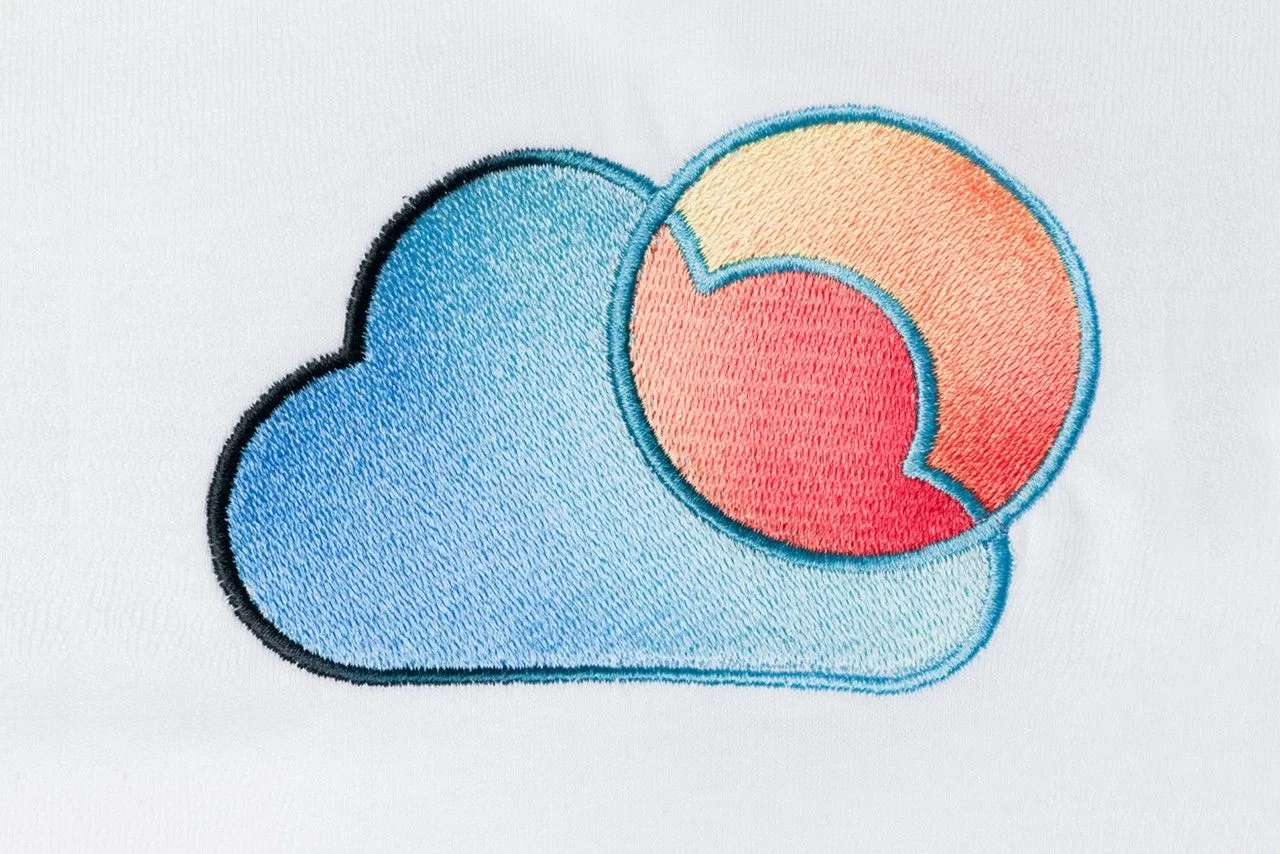
Digital to Embroidered 10X Magnification

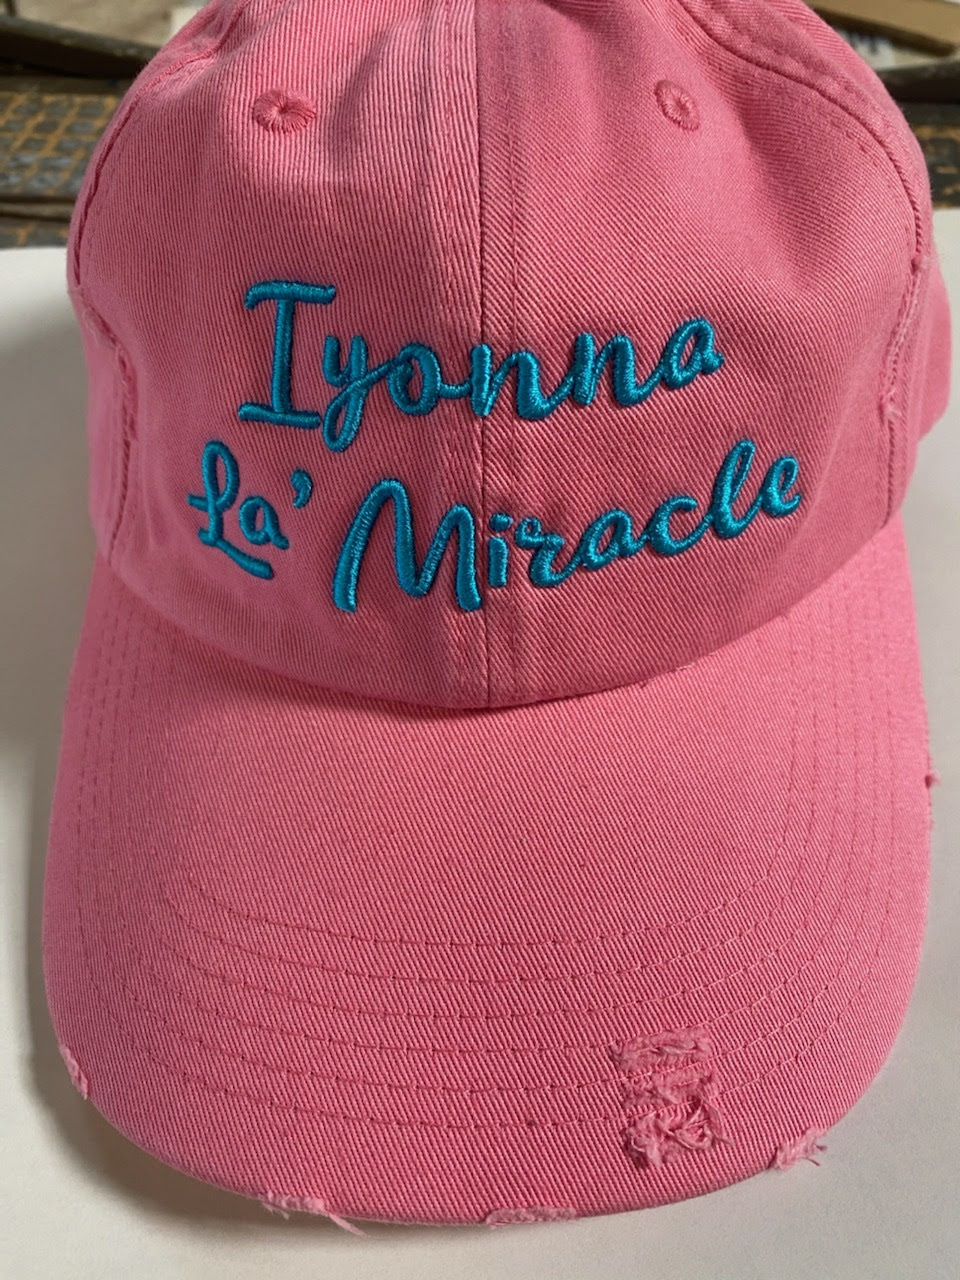
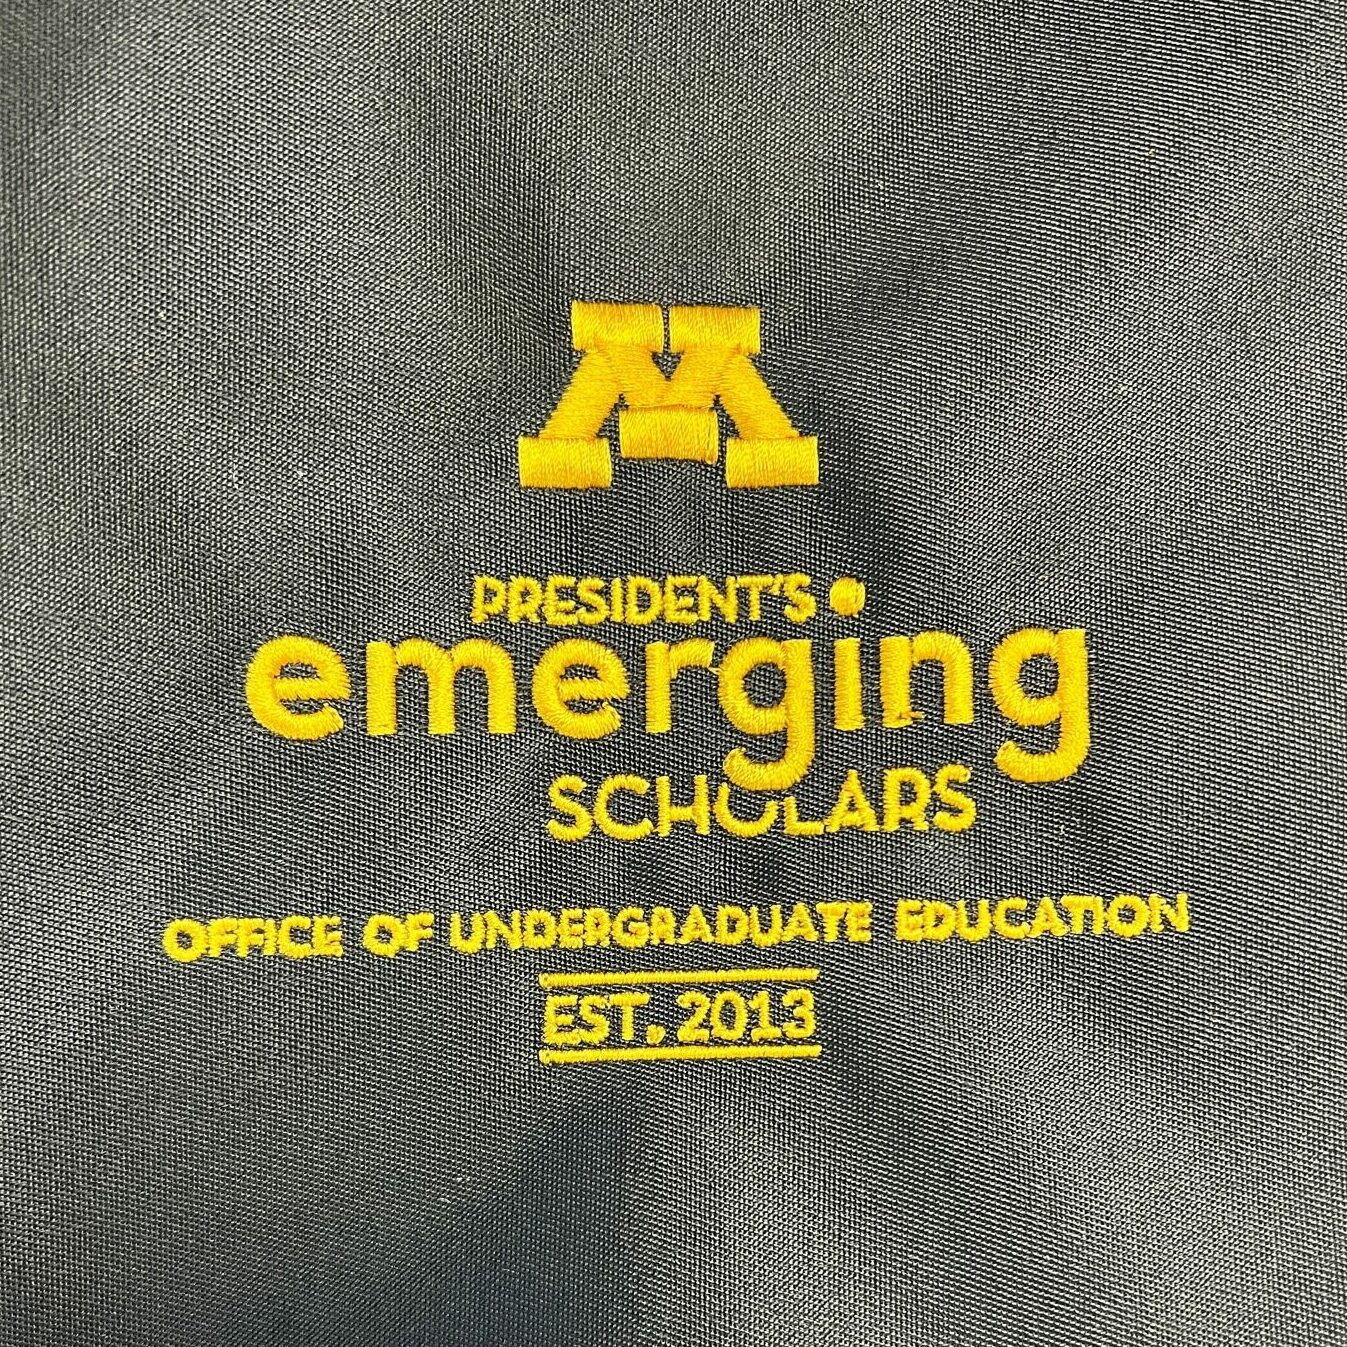
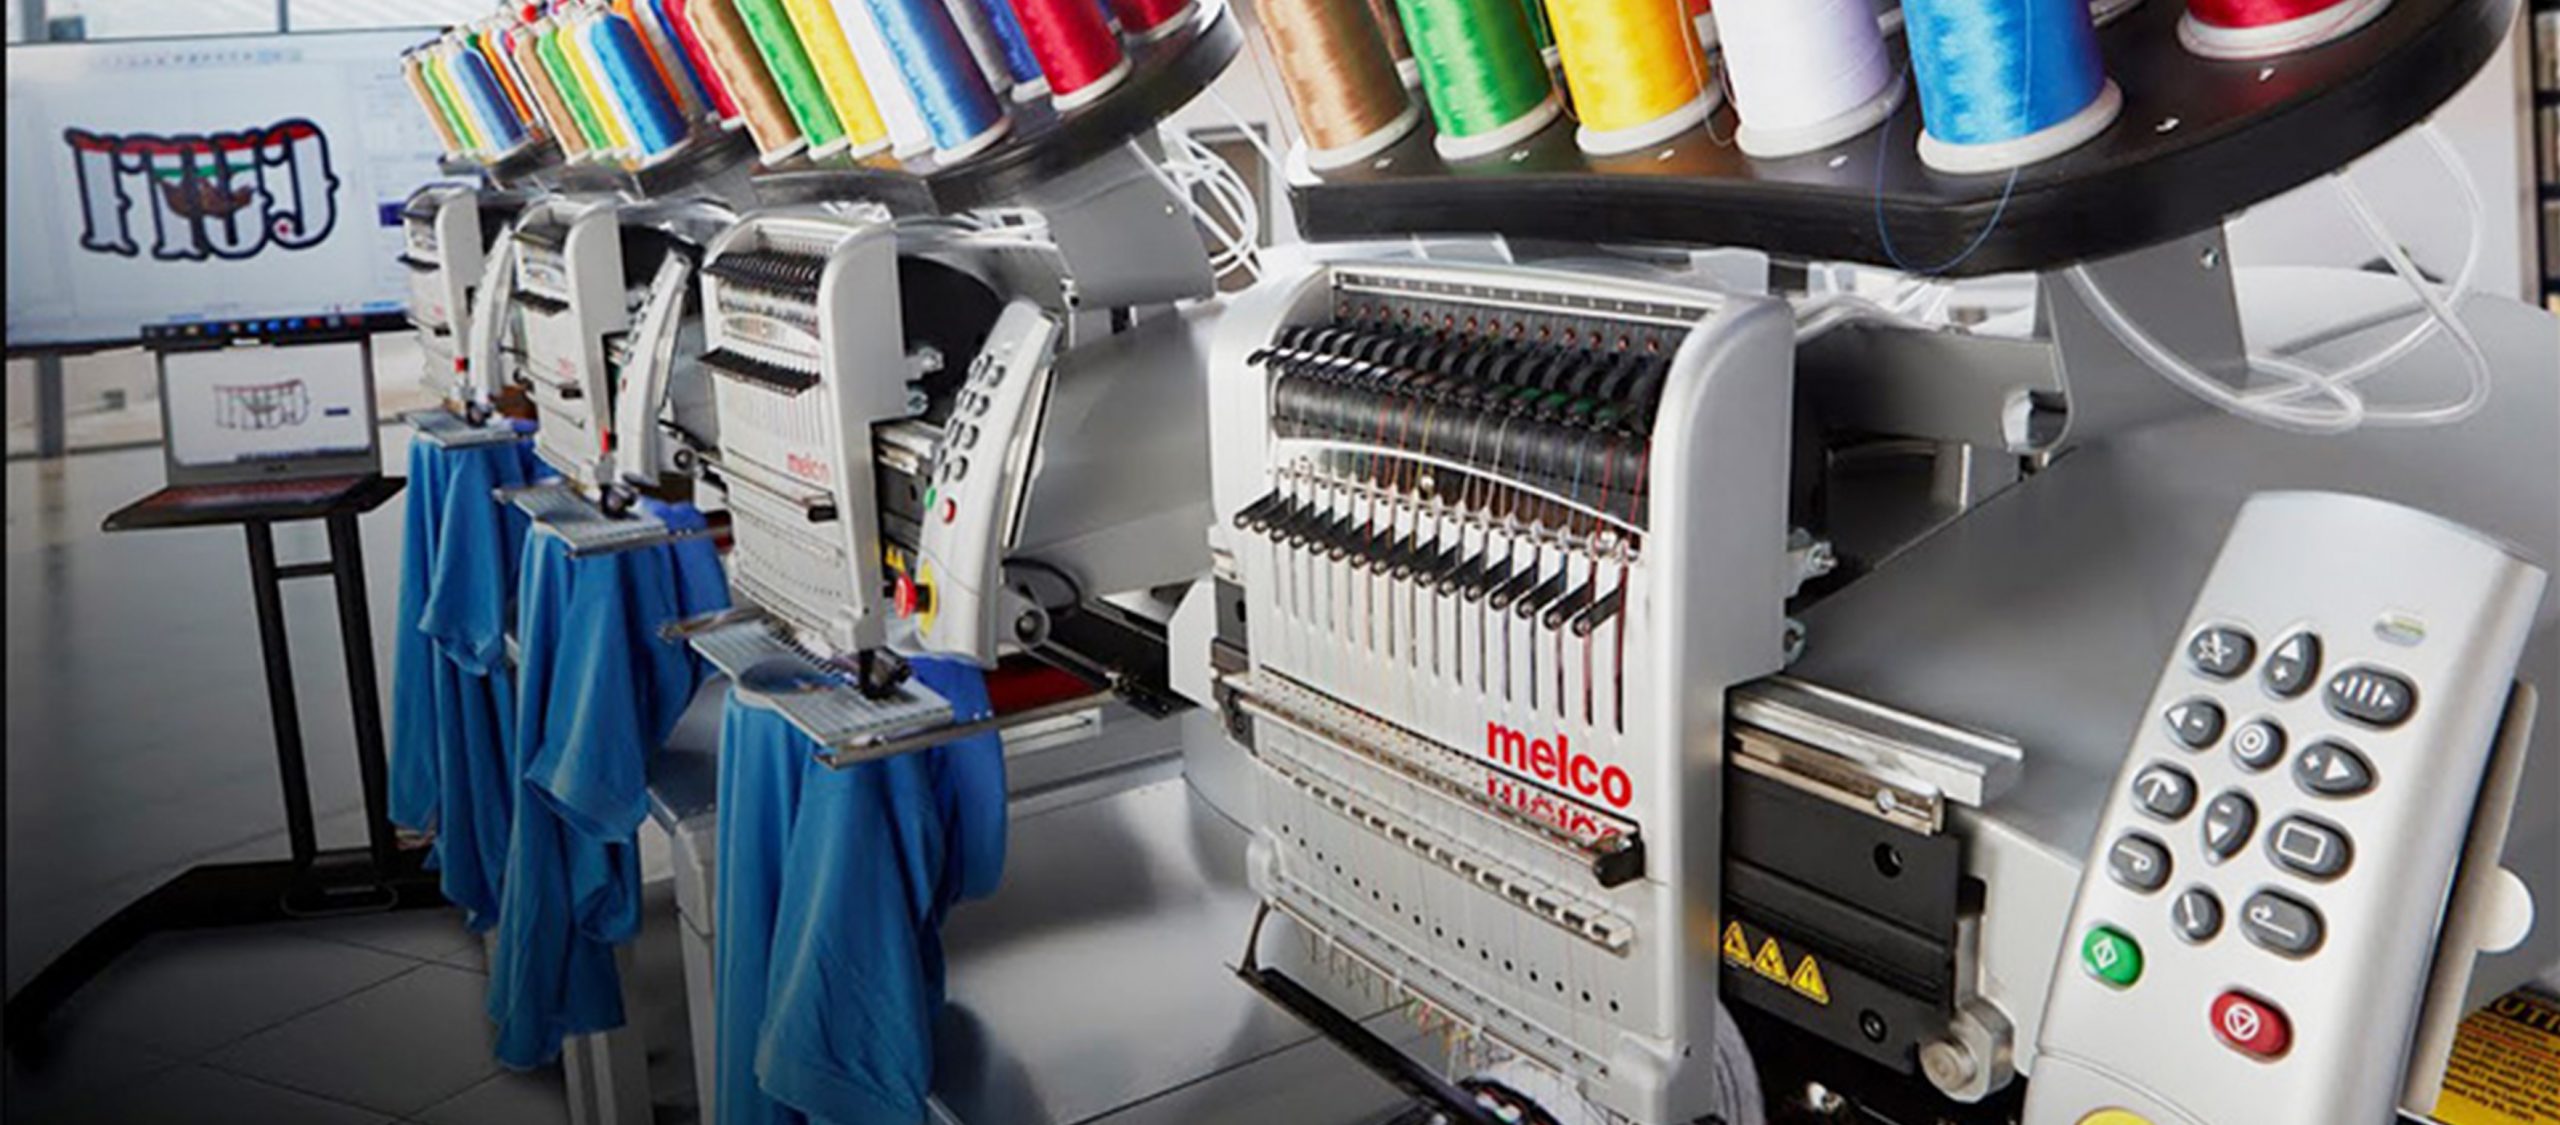
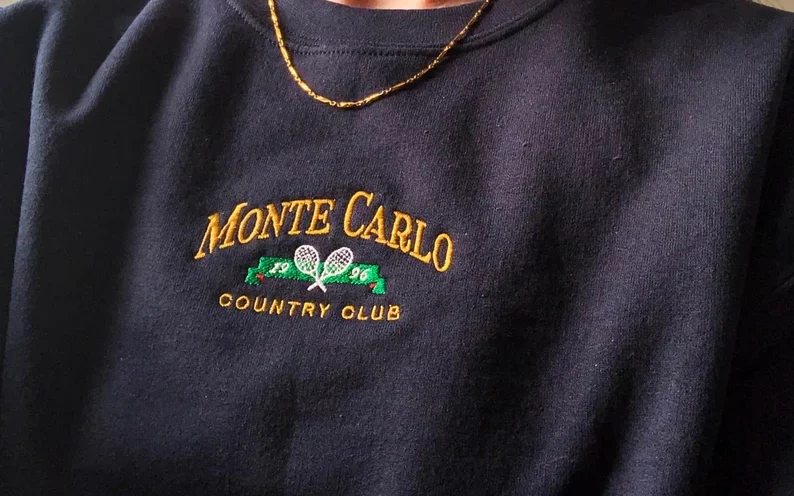
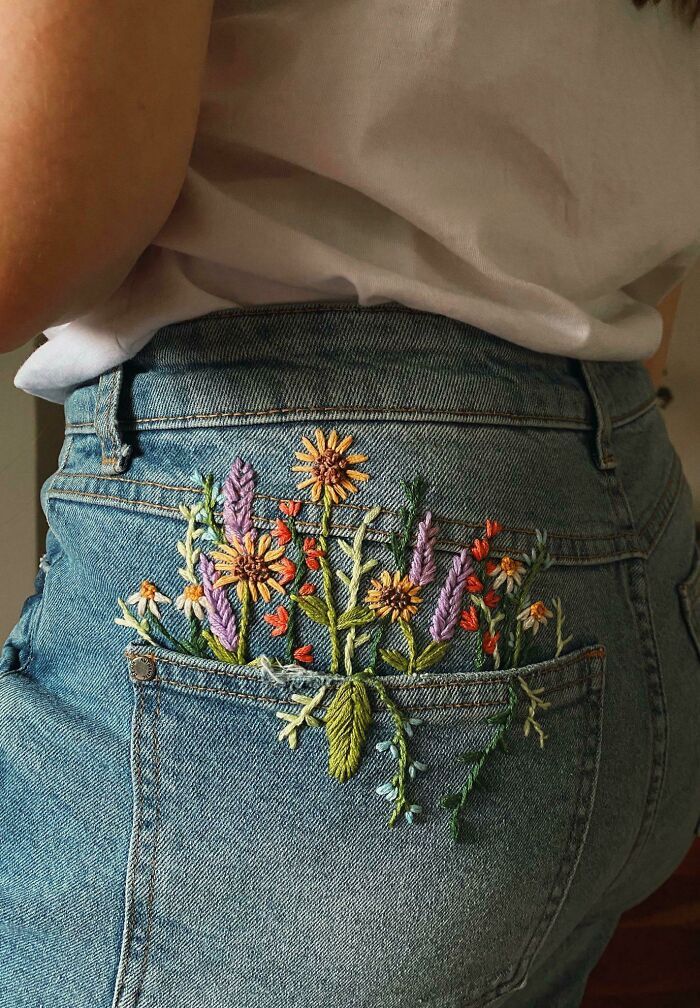
Embroidery offers a touch of elegance and professionalism to any garment. Digitizing your design is a crucial step, transforming it into a format that embroidery machines can read. At Blankstyle, we specialize in converting your designs with precision, ready to be embroidered onto hats, bags, or any heavy apparel. Embroidery pricing is based on the stitch count. Blankstyle offers an easy-to-use Stitch Count Estimator to help you calculate the stitches required for your design, allowing for precise budgeting and planning.

Embroidery begins with the art of digitization, where original artwork is meticulously transformed into a stitch pattern compatible with embroidery machines. If you want to understand the nature of your unique customized polo shirt design, you must first understand what it takes to make that design. The intricacies of this process, from the stitch count to the time and materials involved, are integral to determining the embroidery pricing. Unlike instant transformations, digitizing is an intricate art that demands time and expertise, forming an essential pre-embroidery cost. For practical cost estimation, the stitch count is projected through an educated estimation for your custom tee project, predicting the number of stitches that will ultimately define the digitized design’s complexity and price.

Custom t-shirt printing opens the door to unparalleled personalization, giving businesses the power to create a distinctive and unique customized polo shirt design that stands out. From selecting the ideal fabric to choosing the perfect ink for printing, each choice is a critical note in the symphony of design that will resonate with your brand’s identity. Embroidery, often the star of the show on polos and sturdier materials, adds a refined touch to your statement piece, ensuring every aspect of your custom design harmonizes with your branding strategy.

Unique Customized Polo Shirt Designs

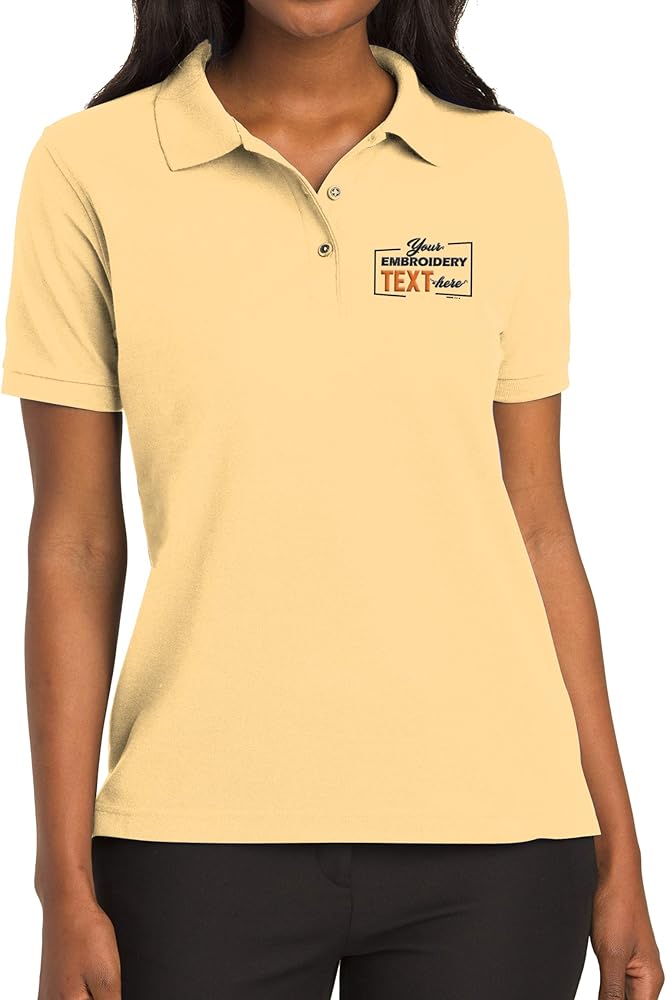
In the world of custom apparel, the unique customized polo shirt design holds a prestigious spot. Polos have transcended time, maintaining a classic appeal while offering a modern canvas for personalization. When it comes to polo shirts, the embroidery method shines, elevating the garment with a touch of sophistication and durability suited for corporate wear or casual elegance compared to your average custom tee.

By integrating a customized polo shirt design into your branding or personal style, you assert a level of professionalism and attention to detail that screen printing on other garments might not convey. Whether it’s for a company uniform, a golf event, or just a stylish twist to everyday wear, a uniquely embroidered polo can make a lasting impression. Blankstyle understands the significance of such tailored designs and offers a wide selection of polo shirts that can be customized to fit your specific aesthetic and branding needs.

As you dive into designing, consider the longevity of your design. Trends come and go, but a timeless design can transcend the fluctuating tides of fashion. Aim for a balance between contemporary appeal and enduring style. This ensures your custom tees remain relevant and treasured wardrobe staples for years. Smaller designs, text-based motifs, and illustrations are best suited for embroidery. These types of designs ensure clarity and aesthetic appeal on various garments. Blankstyle excels in bringing your creative ideas to life with high-quality embroidery.

Does Blankstyle have a contract embroidery shop near me?

At Blankstyle, we understand the importance of quality and efficiency in custom apparel branding. That’s why we offer professional contract embroidery services, tailored for businesses that aim to leave a lasting impression through exquisitely embroidered garments. With our competitive bulk pricing, it becomes a practical choice to entrust us with your embroidery needs, especially when working with exclusive retail brands like Gfore, Carhartt, and Nike that mandate reseller-completed embroidery services.

For those who possess their own embroidery setup and wish to cater to a local clientele, collaborating with Blankstyle could be your strategic move to expand. While you focus on cultivating local relationships and managing in-house production, we’ll take care of the intricate embroidery, ensuring it meets the high standards your customers expect. Plus, with our blind shipping service, your customers will receive their orders directly from our nearby facilities, as if they were shipped from your shop, allowing you to maximize the use of your machines and elevate the capacity of your business’s embroidery services.

Screen Printing vs. Embroidery

Screen printing is ideal for large volume orders with fewer colors, offering economic production and vibrant designs. Embroidery, on the other hand, adds a premium and detailed finish, perfect for logos and sophisticated patterns.

Moreover, it’s not just the visual elements that matter; functionality plays a significant role. A well-designed shirt is one that’s comfortable to wear and fits the intended purpose, whether it’s for casual Fridays at the office or as part of a uniform for staff at corporate events. The right material and fit are as important as the logo emblazoned on the chest.

Custom Design T Shirt Printing

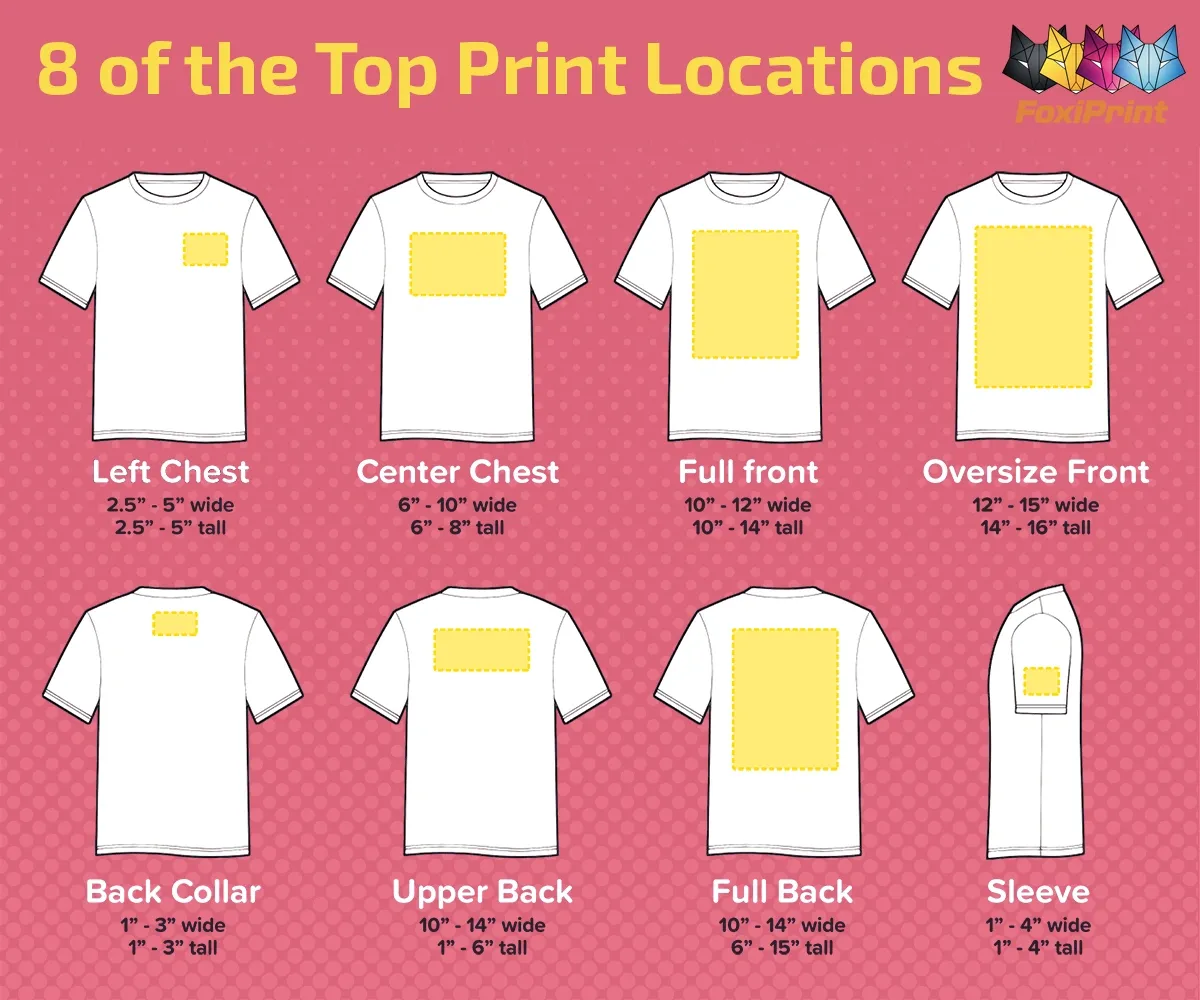
Design guide for screen print sizing

This image provides a detailed guide to the top eight print locations on a t-shirt for customization and branding. The “Left Chest” area, suitable for logos and emblems, spans approximately 2.5 to 5 inches in width and height. The “Center Chest” is slightly larger, offering a space of 6 to 10 inches wide and 6 to 8 inches tall for more prominent designs.

For maximum visibility, the “Full Front” section allows for designs that are 10 to 12 inches wide and 10 to 14 inches tall, while the “Oversize Front” goes even larger at 12 to 15 inches wide and 14 to 16 inches tall, making a bold statement. On the reverse side of the tee, the “Back Collar” offers a discreet branding opportunity with a 1 to 3-inch print area, and the “Upper Back” gives a generous canvas of 10 to 14 inches in width and 1 to 6 inches in height.

For full coverage, the “Full Back” can accommodate designs that are 10 to 14 inches wide and 6 to 15 inches tall. Lastly, the “Sleeve” print location is ideal for small badges or text, ranging from 1 to 4 inches both in width and height, providing a subtle yet stylish branding element. Each of these locations allows for creative expression for your custom tee and impactful brand placement on custom apparel.

world design day screen print example
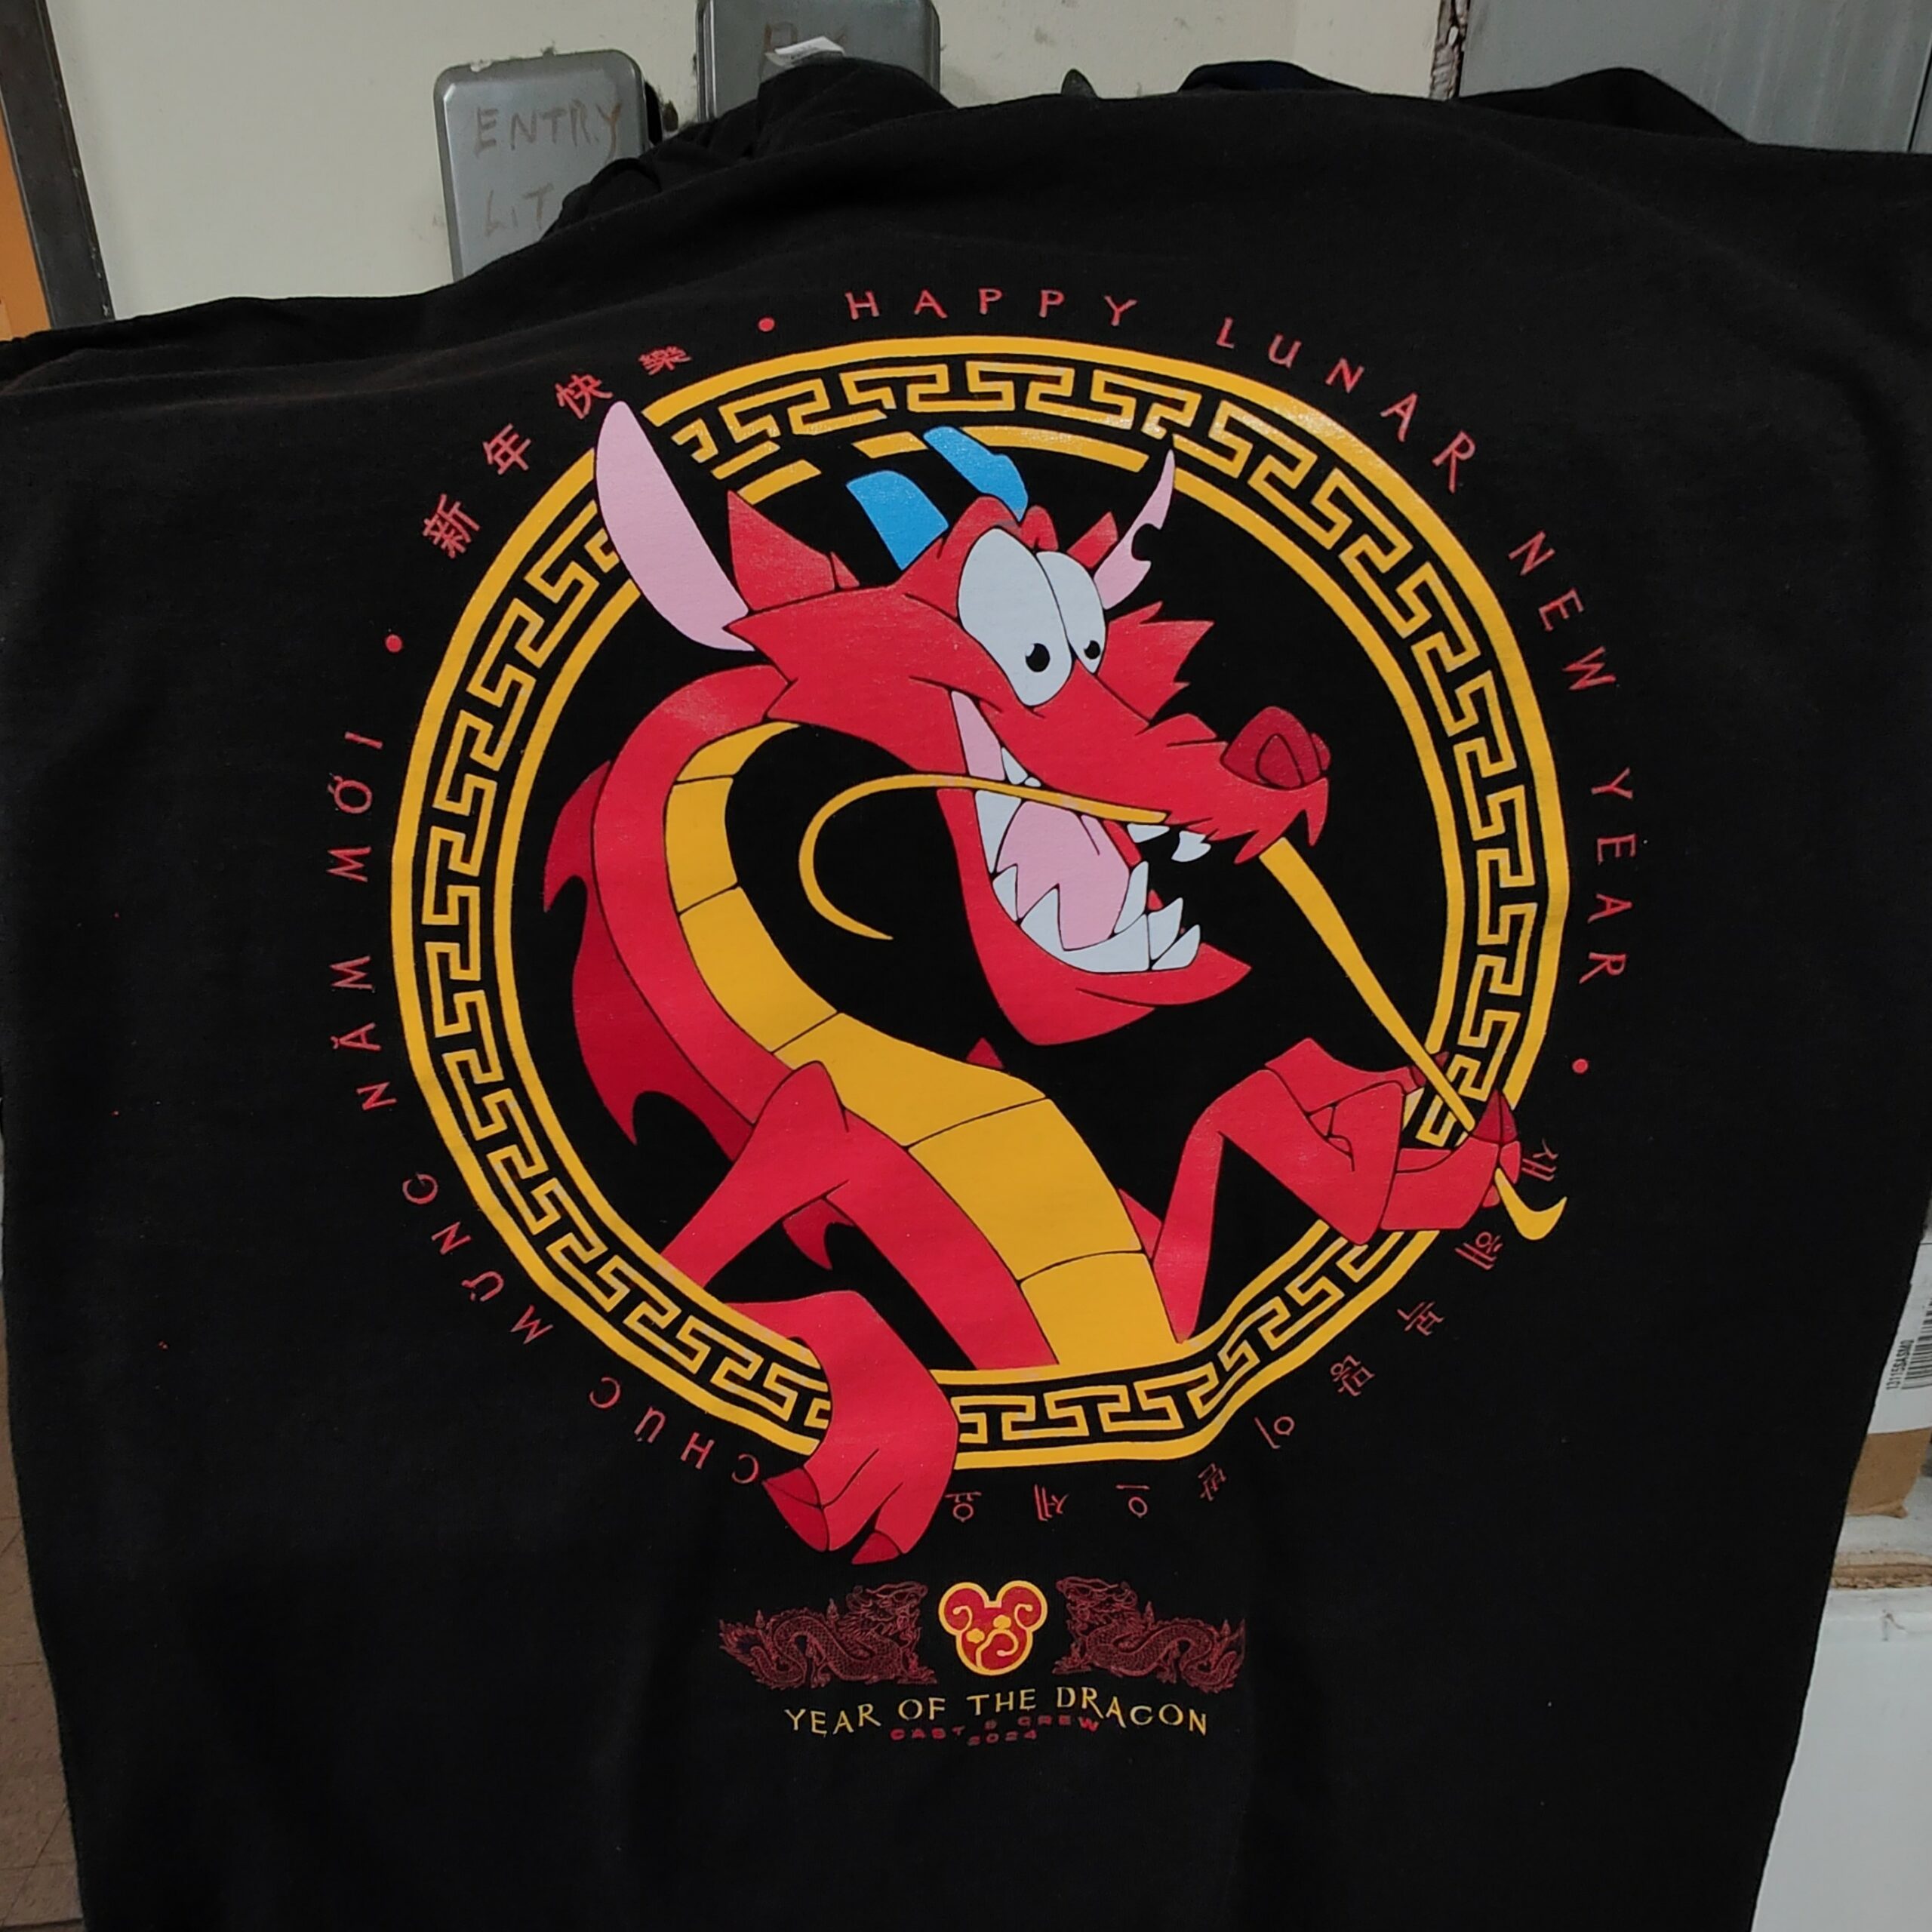
Plastisol ink is renowned for its longevity and precise color-matching, perfect for an array of designs, including text-heavy graphics. It’s versatile enough for light and dark fabrics alike, with the thickness of the print depending on the number of colors in the design.

For those desiring a softer print, Soft-Feel Plastisol is a variant that allows the fabric’s texture to peek through, offering a lighter touch to the print. This method thins the plastisol, making it semi-transparent, which is not ideal for dark garments due to its subtlety. While this approach may limit exact color matching, it’s perfect for lighter fabrics where a more subdued print is desired. Consultation with our expert customer service can guide you through this nuanced process.

Water-based Discharge printing is another alternative for those seeking the lightest touch in screen printing. This method bleaches the fabric color before applying ink, leaving behind a soft print that feels as if it’s part of the shirt. However, because it alters the fabric’s original color, the outcome might slightly differ from the intended design, especially if not printed on white. This technique is exclusive to 100% cotton garments to ensure the ink adheres properly and color matches are as accurate as possible.

Ink Effects

Crystalina overlay screen printing on a custom tee

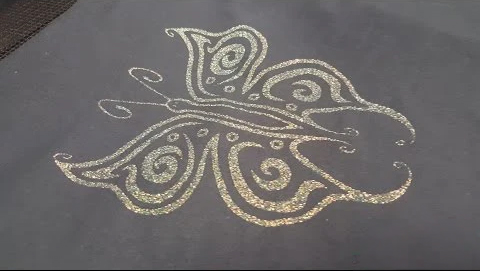
Crystalina overlay screen printing on a custom tee for World Design Day

Additional screen print processes that we offer include metallic foils, Crystalina overlay, metallic inks, and puff ink! The foil method is great for anyone looking to make a statement to their custom tee or add some lightweight bling to their print! This is applied by first laying down a layer of glue to the desired areas on the garment, and then laying a chrome foil over the glue. Heat is applied to bond the two together, and the end result is a bright, flashy metallic finish.

Color options are limited to the foil colors that we offer. Crystalina overlay adds depth and sparkle to your design by laying a thick, translucent layer with colored shimmer over specified colors within your design for your custom tee. Crystalina adds just the right amount of sparkle, and is great for women’s and children’s designs. It can be applied to only one color layer, or your entire design.

World Design Day Should Inspire!

On World Design Day, we recognize the power of thoughtful design in shaping perceptions and creating memorable brands. Your custom tees are not just attire; they’re walking billboards that can amplify your brand’s presence in the world. So take this opportunity to unleash your creativity, collaborate with seasoned designers, and craft that perfect piece of apparel that embodies the essence of your business.

Brands That Have Been Inspired by us

Blankstyle has had the privilege of collaborating with a diverse range of businesses and brands, each with their own unique story and mission. Our experience with these partnerships has not only enriched our portfolio but also allowed us to play a role in their success.

One such brand is Training Day Media, whose dedication to positive reinforcement and motivational content truly sets them apart. With a focus on themes of strength and personal achievement, their content serves as a daily dose of inspiration to their audience. Their goal to ignite creativity and encourage others to pursue their passions aligns perfectly with our mission at Blankstyle. We provided the perfect apparel that resonated with their brand voice, helping them to weave their empowering messages into wearable art. Their vision is a testament to the power of positive messaging and the impact it can have on a community.

Another brand that stands out in our collaborative history is Synister Clothing, a brand that champions the ethos of non-conformity. Synister Clothing has built a sanctuary for the individuals who find solace in the goth and emo subcultures of the early 2000s. They’ve managed to tap into a niche market with precision and authenticity, capturing the attention of over 24,000 followers across social media platforms. This impressive reach is a clear indicator of their resonating appeal and their ability to grow a dedicated fan base. Blankstyle has proudly supplied them with high-quality apparel that serves as the foundation for their unique designs, playing a part in the expression of individuality that their brand encourages.

Our collaboration with CHOMP by Joshua Ariza epitomizes the fusion of fashion and art. Joshua’s 15-year tenure in design for prominent lifestyle brands brings a wealth of experience to his personal project. His custom tee’s at CHOMP stands out for its compelling artwork, which transforms ordinary apparel into extraordinary statements. By selecting Blankstyle for their apparel needs, CHOMP ensures each piece reflects the high standards of quality and creativity they’re known for. It’s a partnership that exemplifies the power of wearable art to express identity and innovation.

These collaborations have not only enriched the brands we’ve worked with but have also allowed Blankstyle to refine our understanding of the diverse needs of our customers. We look forward to fostering more partnerships with businesses and brands that seek to make a difference through their products and messages. Whether it’s a startup or an established company, Blankstyle is dedicated to providing top-notch services that complement and elevate the vision of our clients.

Top T-Shirts Used for Custom Tee’s

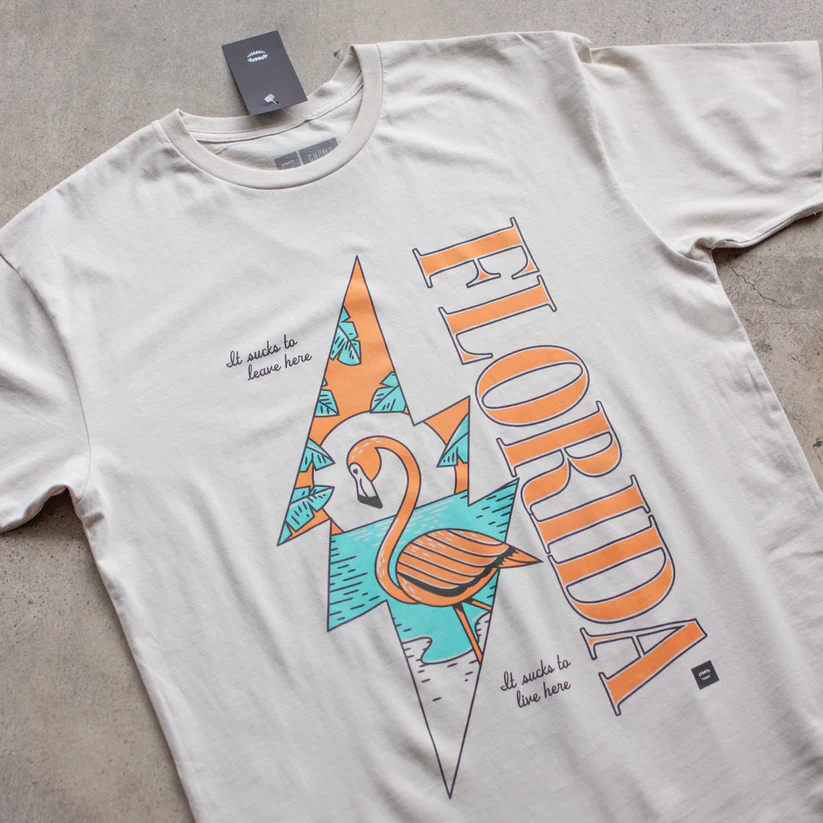
In their recent creative endeavor, CHOMP clothing turned to Blankstyle for high-quality apparel, handpicking the Cotton Heritage MC1082 for its superior comfort and construction. Joshua Ariza’s vision comes to life on this ideal blank, particularly with their Florida Flamingo shirt, a piece that perfectly encapsulates CHOMP’s aesthetic. The shirt features a captivating and playful homage to Florida, illustrated with a fresh palette of teal and coral that captures the state’s tropical charm, all set upon a subtle, sandy-colored base. The brand has also experimented with other quality garments like the M&O Knits 6500M, finding a complementary backdrop in the Cotton Heritage MC1082’s versatile sand shade.

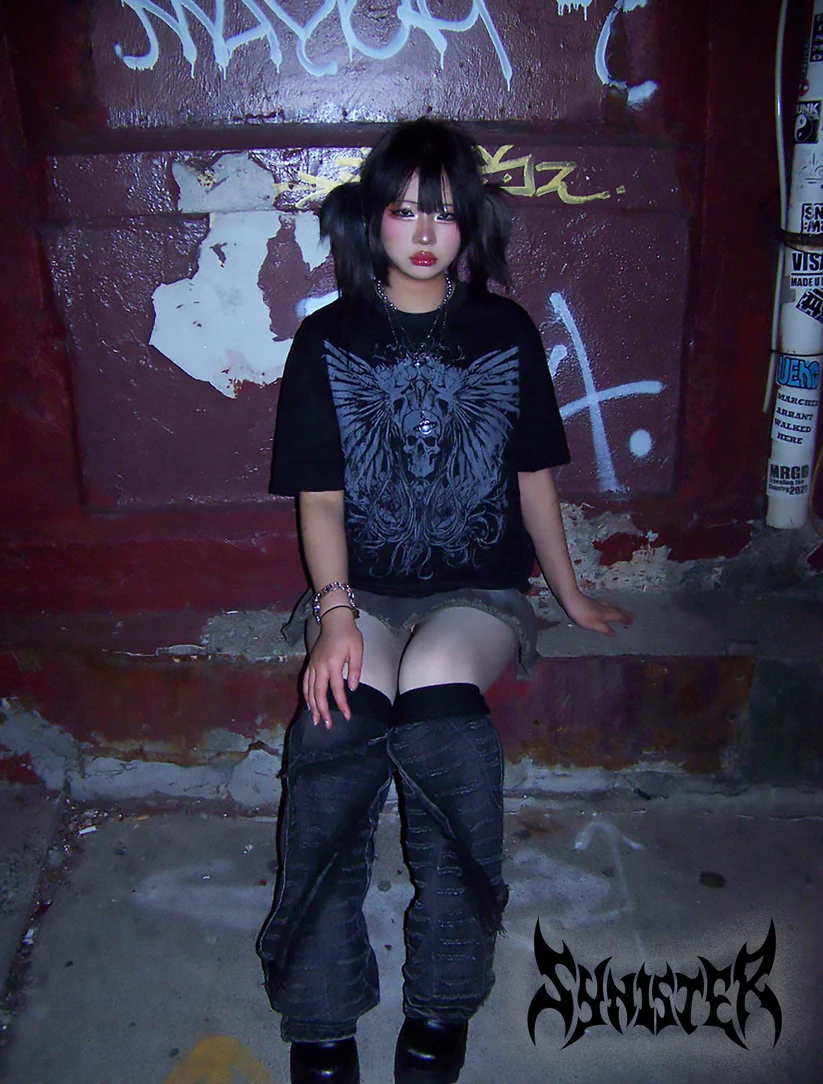
For their bespoke creations, Synister Clothing selected the robust and comfortable Alstyle 1301 Heavyweight T-Shirt by American Apparel in a sleek black, seeing it as the quintessential foundation for their unique custom tee’s designs. Synister Clothing’s offerings are meticulously crafted upon order, underscoring the brand’s dedication to exclusivity and individual expression. Their preference for the Alstyle 1301 is a testament to their pursuit of excellence, signaling that they value high-quality materials as the cornerstone of exceptional apparel.

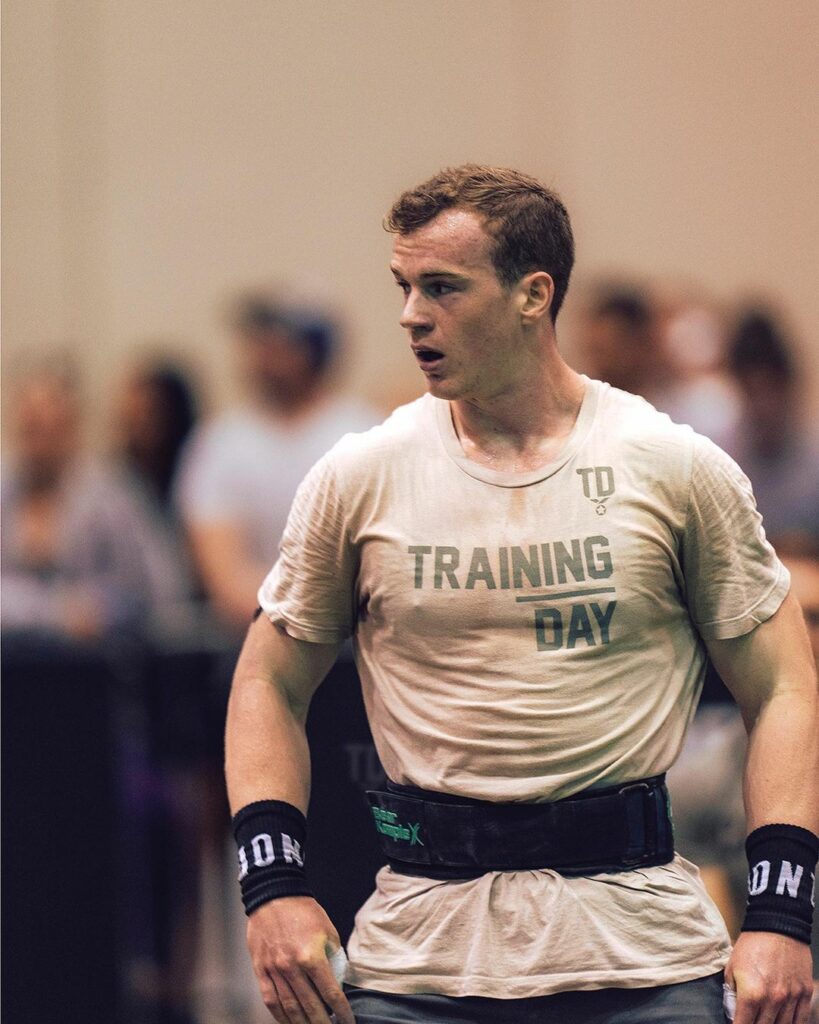
Over the last three years, Blankstyle has proudly served as the go-to resource for Training Day Media, furnishing the ideal backdrop for their signature creations. Favorites such as the Bella Canvas Soft Cotton T-Shirt and the Bella + Canvas Fast Fashion Heavyweight Street Tee have been staples in showcasing their brand’s unique message, amplifying their reach to a broader audience.

Custom design t shirt printing opens the door to unparalleled personalization, giving businesses the power to create a distinctive and unique custom polo shirt design that stands out. From selecting the ideal fabric to choosing the perfect ink for printing, each choice is a critical note in the symphony of design that will resonate with your brand’s identity. Embroidery, often the star of the show on polos and sturdier materials, adds a refined touch to your statement piece, ensuring every aspect of your custom design harmonizes with your branding strategy.

Let World Design Day be the spark that ignites your creative spirit and propels your brand into uncharted territories of innovation. At Blankstyle, we’re not just a service; we’re a conduit for your imagination. We invite you to dive into the rich educational resources we’ve curated, guiding you to uncover the potential of your next big project. Whether it’s exploring the vibrant world of screen printing, delving into the intricate art of embroidery, or venturing into the realm of Direct to Garment (DTG) printing, our platforms are designed to enlighten and inspire. With us at your side, the journey from concept to creation is boundless.

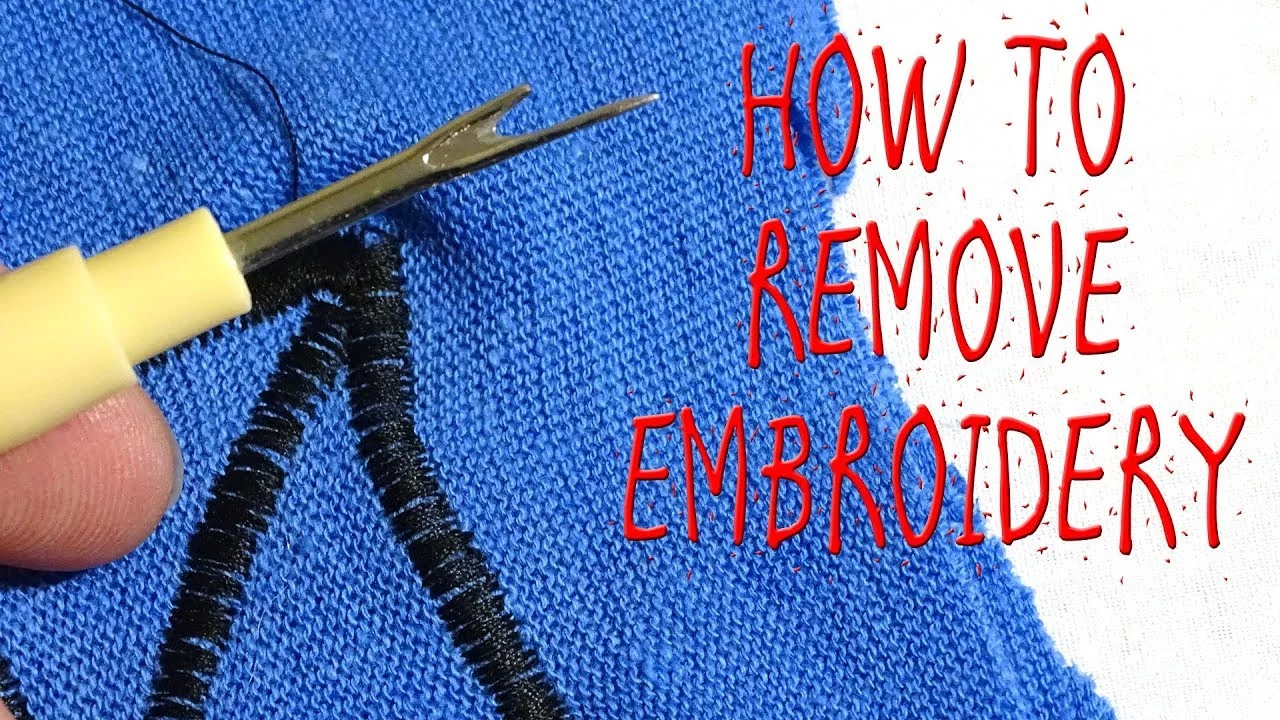
Unlock the door to a universe where your vision is translated into a tangible custom tee with memorable designs that echo the essence of your brand. If you’d like a tutorial on how to use our services, check out this video here.

Short Sleeve Hooded Sweatshirt: The Next Craze in Baseball

Short Sleeve Hooded Sweatshirts: The Latest Craze in Little League Baseball

short sleeve hooded sweatshirts

As the baseball season swings into full gear, Little League coaches are stepping up their game, not just on the field but in team fashion as well. In a trend inspired by the flair of minor league teams, short sleeve hooded sweatshirts are becoming the must-have item for coaches and players alike. This versatile piece, which straddles the line between casual and athletic wear, is seeing a surge in popularity but isn’t as readily available in retail as one might expect. That’s where the creativity of customization comes into play.

Customization has always been at the heart of team sports. It’s about more than just a logo or a team name; it’s about identity, unity, and spirit. And with short sleeve hooded sweatshirts being the newest trend, many coaches are choosing to purchase blank apparel to personalize. Blankstyle steps up to the plate offering a plethora of options for teams to customize and make their own.

From the dugout to the batting cages, these short sleeve hooded sweatshirts offer a comfortable, stylish alternative to traditional baseball gear. They’re perfect for the unpredictable weather of spring and fall seasons, providing enough warmth without the full coverage of long sleeves that can restrict movement. So if you’re looking to recreate an aesthetic similar to this shirt by the Angels, then keep on reading!

Short Sleeve Sweatshirt Blanks

Sport Tek ST297 Sport-Tek PosiCharge Tri-Blend Wicking Fleece Short Sleeve Hooded Pullover in Dark Grey HTHR

Our selection includes favorites like the Sport Tek ST297 Sport-Tek PosiCharge Tri-Blend Wicking Fleece Short Sleeve Hooded Pullover. This particular model is a hit for its moisture-wicking fabric, keeping players cool and dry even as the game heats up. For those seeking a lighter option, the A4 N3408 – Cooling Performance Short Sleeve Hooded Tee is an excellent choice with its performance fabric. And let’s not forget the A4 N3410 – Cooling Performance Sleeveless Hooded T-Shirt for the ultimate combination of breathability and freedom of movement.

Whether you’re in search of a womens short sleeve hooded sweatshirt or men’s short sleeve hooded sweatshirts, Blankstyle has got your team covered. We understand the need for quality and affordability, which is why we offer these garments as short sleeve sweatshirt blanks, ready for your team’s unique customization. At Blankstyle, customization isn’t just an option; it’s an invitation to showcase your team’s personality and cohesion. Our in-house decoration team stands at the ready, equipped with an extensive array of options and methods to bring your vision to life. Screen printing offers a classic and bold statement for those eye-catching, full-front designs, ensuring your team’s logo stands out in the crowd and on the field.

For a touch of elegance and a smaller, more detailed aesthetic, embroidery remains a top choice. It’s perfect for those seeking a refined and durable embellishment, ideal for smaller logos that speak volumes through quality and design. Whichever path you choose, Blankstyle is committed to delivering a swift and satisfactory experience, ensuring your team steps out not just in style, but with confidence.

With Blankstyle, you’re not just buying a product; you’re creating a piece of your team’s story. We are dedicated to providing a seamless service that matches your team’s pace, ensuring you receive your decorated apparel swiftly and without hassle. So step up to the plate and let us hit a home run together with apparel that your team will wear with pride.

Custom team apparel has never been easier or more accessible. At Blankstyle, we provide the canvas, and you bring your team’s vision to life. Gear up for the season with the latest in baseball apparel trends and give your team the winning edge in both performance and style. Visit our website to explore our extensive range of short sleeve hooded sweatshirts and start designing your team’s next iconic look today.

How much is an embroidery machine? It’s complicated

how much is an embroidery machine

Embroidery machines are versatile tools that enable creatives and entrepreneurs alike to bring intricate, threaded designs to life on a plethora of fabrics. Whether you’re looking to start a home-based embroidery business, offer embroidery services, or simply pursue a new hobby, understanding the cost of an embroidery machine is crucial to making an informed decision. So how much is an embroidery machine? Let’s take a look at some factors, options, and things to consider:

The Cost Spectrum of Embroidery Machines

Embroidery machines come in a wide range of prices, largely dependent on their capabilities, size, and intended use. At the entry-level, basic machines suitable for hobbyists can be found starting around $500. These machines from Brother are often compact and user-friendly, designed for those new to embroidery or with limited project needs. If you’re a local and casual hobbyist, this is likely the kind of machine you should be purchasing. While it does not have very advanced features, it likely has some cute small digitized designs pre-loaded and perfect for a creating custom gifts.

For those seeking more professional results or looking to start a small business, mid-range machines offer enhanced functionality, including larger embroidery areas, advanced stitching features, and more design flexibility. These models from Amazon can range from $5,000 to $10,000. This is really only useful if you’re looking for something that can make lots of designs fast. If you’re looking for machines like this, you should have some background knowledge on digitizing and really know what you want to use these machines for. If you’re just starting out a small business, it’s still not recommended to drop $100 on a machine unless you have guaranteed buyers.

At the high end of the spectrum are commercial-grade embroidery machines. These are designed for continuous, heavy-duty use and can handle multiple threads simultaneously. With prices starting from $15,000 and only goes up from there, these machines are an investment intended for serious businesses that require the utmost in efficiency, speed, and quality. However, for the average embroiderer, it isn’t the most necessary purchase.

How Much is an Embroidery Machine? Factors Influencing the Price

– Functionality: More expensive machines often feature larger embroidery areas, allowing for more substantial and complex designs. They may also offer higher stitching speeds, more built-in stitches, and advanced editing capabilities right on the machine.

– Multi-Needle Options: Higher-end models frequently come with multiple needles, enabling you to work with several thread colors simultaneously without needing to change threads manually. This feature is particularly beneficial for those looking to streamline their workflow and increase production speed.

– Connectivity and Software: Modern embroidery machines offer various connectivity options, including USB ports and wireless connectivity, allowing for easy design transfers. The inclusion of proprietary or third-party software for design creation and editing can also affect the price.

Embroidery Services as an Alternative

If the question “how much is an embroidery machine” is causing you stress, fret not! There are alternative options available that might better suit your needs. For both individuals and businesses not prepared to make the investment in their embroidery machinery, outsourcing to local embroidery services presents a practical solution. These services possess the expertise and equipment necessary to produce top-notch embroidered items without requiring upfront investments in machinery. Prices for embroidery services can vary significantly, depending on factors such as the complexity of the design, the quantity of items being embroidered, and the fabric type.

Discover Quality Embroidery Services with Blankstyle

As your trusted online resource for all things apparel, blankstyle offers a convenient and affordable solution for your embroidery needs. With our expert embroidery services, you can bring your designs to life with ease. From custom logos to intricate patterns, we work closely with our clients to deliver high-quality embroidered items that exceed expectations. Explore our range of services today and experience the convenience of professional embroidery with Blankstyle!

How much is an embroidery machine vs Blankstyle’s embroidery?

Now this is a topic that could be a blog in it of itself! The debate between investing in an embroidery machine and utilizing another shops embroidery services is a multifaceted topic worthy of exploration. There are several crucial points to consider in this comparison.

To answer the question “How much is an embroidery machine?” you really have to consider more than just the purchase price. There is the initial purchase which carries with it a cost of money either financing or cash on hand otherwise undeployable. Post-purchase, you’ll encounter ongoing operational costs, including the need for skilled operators. Additionally, you’ll have to account for supplementary expenses such as hoops, various thread colors, and other essentials. Moreover, storing the machine and its substantial power consumption are factors to bear in mind. Calculating the cost per stitch and comparing it to Blankstyle’s pricing structure becomes essential in determining the most economical approach.

It’s challenging to provide a precise example as certain machine-related costs are spread out over time, while others are job-specific. As a general guideline, if your embroidery machine isn’t operational for a significant portion of your working hours, the cumulative expenses of machine ownership per job could outweigh the benefits. Each shop has a different cost of operation depending on many variables so it actually very likely could cost you more to run your own machine!

In essence, the decision between purchasing an embroidery machine and leveraging established services in another’s shop hinges on a thorough assessment of your operational needs and financial considerations. Only then can you make an informed choice that optimizes both efficiency and cost-effectiveness for your embroidery endeavors.

How to Make Embroidery Patches

How to Make Embroidery Patches

How to make embroidery patchesCreating custom embroidered patches for your apparel, such as hats, jackets, and bags, elevates your style and adds a personal touch to your wardrobe. However, crafting these patches goes beyond simple DIY methods; it involves intricate processes and specialized industrial equipment. In this guide, we’ll explore how to make patches, focusing on embroidered patches, and introduce you to the ease and convenience of customizing your apparel with professional embroidery services.


The Craft of Making Embroidered Patches

Embroidered patches are the most common type of patches, known for their durability and vibrant designs. These patches begin as a piece of fabric onto which a design is embroidered using high-speed, computer-controlled embroidery machines. The complexity of the design, the type of fabric, and the choice of threads all play crucial roles in the final look and feel of the patch.

While it might seem feasible to attempt making a patch at home, the reality is that achieving professional quality requires more than just a needle and thread. Industrial embroidery machines can handle multiple colors of thread and intricate designs with precision, something far beyond the capability of standard home sewing equipment. Besides embroidered patches, there are other types such as woven, 3D, and chenille, each offering unique textures and visual effects for custom apparel.

 Designing Your Patch

The first step is to design your patch. You can use graphic design software like Adobe Photoshop or Illustrator, or simpler tools like Canva for basic designs. Remember to consider the size of your patch and the complexity of the design, as detailed designs may require more advanced embroidery skills.


Iron-On Patches: A Convenient Choice

When it comes to attaching your custom patch to apparel, iron-on patches offer a seamless and convenient method. If you’re pondering “how to make embroidery patches”, it’s typically best to consult with professionals. The “iron-on” designation pertains to a special backing on the patch, enabling it to bond to fabric through the application of heat. This approach is perfect for anyone looking for a fast and reliable means of affixing their patch, eliminating the necessity for sewing.

Besides iron-on, there are other types of patch backings, such as Velcro or adhesive, each offering different benefits depending on the application. For example, Velcro backings are perfect for situations where you want the flexibility to remove or change patches, while adhesive backings offer a temporary solution for events or promotions. 

Professional Embroidery Services: Your Path to Custom Patches

Understanding how to make embroidery patches unveils the complexity and skill required to produce high-quality custom patches. Instead of tackling this intricate process solo, it’s advisable to leverage professional embroidery services. Equipped with advanced machinery and expertise, these services can adeptly transform your design into stunning embroidered patches, guaranteeing your custom apparel truly stands out.

For individuals in search of custom patches for their apparel, the journey to bringing your unique vision to life is simplified by professional services. By submitting a design for an instant quote or initiating a conversation through a call, email, or chat, you can efficiently set the wheels in motion. These professional services are designed to offer unparalleled ease and convenience, ensuring your ideas are transformed into high-quality embroidered patches that meet your exact specifications. Moreover, if you’re wondering about the potential costs, Blankstyle provides an accessible embroidery cost estimator. This tool offers you immediate insight into the stitch count necessary for your design, helping you make informed decisions about your custom patch projects.

Using Blankstyle Embroidery Services

At Blankstyle, we understand that not everyone wants to dive into the intricacies of embroidery work themselves. That’s why we offer custom embroidery services that take care of everything for you, starting from digitizing your design all the way to crafting the final embroidered patch. It’s the perfect solution for those who seek professional-grade quality without the necessity of investing in embroidery equipment.

How to Make Embroidery Patches?

Making your own embroidery patches is a fun and creative way to add a personal touch to your wardrobe or merchandise. With a little practice and the right tools, you can create custom patches that reflect your unique style or brand identity. Whether you choose to DIY or use a service like Blankstyle, the possibilities are endless.

How to do Embroidery?

Mastering the Art of Embroidery: A Comprehensive Guide

Embroidery is a timeless craft that allows you to add a personal touch to clothing, accessories, and home decor. Whether you’re a beginner or an experienced embroiderer, mastering the art of embroidery opens up a world of creative possibilities. In this comprehensive guide, we’ll walk you through the essential steps of embroidery, from basic stitches to custom designs and embellishing clothes.

How to Do Embroidery?

How to do embroidery

Embroidery is a versatile craft that can be done by hand or with the help of a sewing machine. If you’re going through a machine, there are a couple of things to keep in mind you wouldn’t have to if you’re planning to embroider by hand. One is making sure you know the stitch count for the design you’re planning to embroider. Thankfully, Blankstyle has a tool called the Embroidery Cost Estimator. Just upload your design and this tool will spit out how many stitches it’ll take to complete it. Additionally, you’ll have to digitize the file for your specific machine in order for it to stitch it. Otherwise, here’s a step-by-step guide to get you started:

1. Gather Your Supplies:
– Embroidery hoop
– Embroidery needles
– Embroidery floss or thread
– Fabric
– Scissors
– Design template (optional)

2. Prepare Your Fabric:
– Place your fabric in the embroidery hoop, ensuring it’s taut and wrinkle-free.

3. Choose Your Design:
– You can either freehand your design directly onto the fabric or use a design template. Transfer the design onto the fabric using a water-soluble pen or embroidery transfer paper.

4. Select Your Stitches:
– There are numerous embroidery stitches to choose from, including backstitch, satin stitch, and French knot. Start with basic stitches and gradually experiment with more complex ones as you gain confidence.

5. Thread Your Needle:
– Cut a length of embroidery floss and separate it into individual strands according to your desired thickness. Thread your needle with the desired number of strands and knot the end.

6. Begin Stitching:
– Follow your design template or freehand your stitches onto the fabric. Work slowly and carefully, ensuring each stitch is neat and uniform.

7. Finish Your Embroidery:
– Once you’ve completed your design, remove the fabric from the embroidery hoop and trim any excess threads. If necessary, press your embroidery with an iron to remove any wrinkles.

How to Do Custom Embroidery

Custom embroidery allows you to personalize your projects with unique designs and motifs. Here’s how to do embroidery, but with a custom design:

1. Choose Your Design:
– Decide on the design or motif you want to embroider. This could be a monogram, logo, or custom artwork.

2. Digitize Your Design:
– If you’re using a computerized embroidery machine, you’ll need to digitize your design using embroidery software. This process converts your design into a format that the machine can read.

3. Select Your Thread Colors:
– Choose thread colors that complement your design and fabric. Consider using a color chart to help you match colors accurately.

4. Set Up Your Machine:
– Thread your embroidery machine with the chosen thread colors and attach the embroidery hoop to the machine. There are many good starter embroidery machines, but brother typically makes the best.

5. Embroider Your Design:
– Load your digitized design onto the embroidery machine and select your desired settings. Start the machine and watch as it embroiders your design onto the fabric.

6. Finish Your Custom Embroidery:
– Once the embroidery is complete, remove the fabric from the machine and trim any loose threads. Press the embroidery with an iron to smooth out any wrinkles.

How to Do Embroidery on Clothes

Embroidering clothes is a fun and creative way to customize your wardrobe. Here’s how to do embroidery, but on clothes specifically instead of hats or other non-traditional garments:

1. Choose Your Garment:
– Select a garment made from a fabric that’s suitable for embroidery, such as cotton or denim.

2. Prepare Your Garment:
– Place your garment in the embroidery hoop, making sure it’s taut and wrinkle-free. If necessary, stabilize the fabric with embroidery stabilizer to prevent stretching or puckering.

3. Select Your Design:
– Choose a design that complements the style and size of your garment. Consider the placement of the design on the garment and how it will look when worn.

4. Transfer Your Design:
– Transfer your design onto the garment using a water-soluble pen or embroidery transfer paper. Alternatively, you can freehand your design directly onto the fabric.

5. Stitch Your Design:
– Follow the same steps for stitching your design as outlined in the “How to Do Embroidery?” section above. Be mindful of the fabric and adjust your stitches accordingly to ensure they lay flat and uniform.

6. Finish Your Embroidered Garment:
– Once you’ve completed your embroidery, remove the garment from the hoop and trim any excess threads. If necessary, press the embroidery with an iron to remove any wrinkles.

How to do Embroidery? Well, it’s simple!

Embroidery is a versatile and rewarding craft that allows you to express your creativity and add a personal touch to your projects. If you can’t tell by now, there’s many different ways to do embroidery. Now, if you don’t want to do the embroidery yourself, Blankstyle offers embroidery services. That way you can just upload your artwork and pick out your garments and just receive a fully embroidered garment. If you’re looking Whether you’re embroidering by hand or with a machine, the key is to practice and experiment with different stitches, designs, and techniques to hone your skills and create beautiful embroidery pieces.

How to Make Embroidery Designs

how to make embroidery designs

Embroidery has become a popular way to personalize and embellish clothing, accessories, and home decor. But, you may ask yourself, how to make embroidery designs? Lets walk through some popular ways! Whether you’re looking to create unique gifts, start an embroidery business, or simply enjoy a new hobby, designing your own embroidery patterns can be both rewarding and fun. Here’s a straightforward guide on how to make embroidery designs without the need for expensive or complicated software.

Step 1: Choose a Design Tool

The first step in creating your embroidery design is selecting the right graphic design tool. Your choice will depend on several factors including your design experience, budget, and the complexity of the designs you wish to create. Here are two versatile options:

Canva

For beginners and those looking for a quick, easy-to-use option, Canva is an excellent choice. It offers a user-friendly interface and a wealth of pre-made visual assets, making it ideal for those new to design. Canva’s free version may be sufficient for basic designs, but for more intricate patterns or to remove backgrounds, upgrading to Canva Pro is necessary.

Photoshop

For those with more experience in graphic design, Adobe Photoshop offers unparalleled flexibility. It allows for the creation of intricate and detailed embroidery patterns, from sophisticated lettering to abstract forms. The main challenge with Photoshop is its steep learning curve and subscription cost, though a free trial is available to test the waters.

Step 2: Design Your Embroidery Pattern

Once you’ve chosen your design tool, it’s time to start creating your pattern. Here are some tips to guide you:

– Start Simple: If you’re new to embroidery design, begin with simple shapes and designs. Flower embroidery designs are a great starting point due to their versatility and timeless appeal.

– Consider the Medium: Remember that your design will be stitched, so consider how different colors and shapes will translate into thread. This might affect your choice of colors and the complexity of your design. You’ll also need to know how many stitches are in each design in order to accurately predict how much each will cost. For this, you can use Blankastyle’s embroidery cost estimator to get n accurate prediction of this!

– Use Templates: Both Canva and Photoshop offer templates that can kickstart your design process. These can be particularly useful if you’re looking for inspiration or a structured starting point.

Step 3: Preparing Your Design for Embroidery

Once your design is complete, you’ll need to prepare it for the embroidery process. This often involves converting your digital design into a format that embroidery machines can read. While Canva and Photoshop don’t directly offer this functionality, several online services and embroidery software can convert your designs into the appropriate file format.

Once your design is ready, it needs to be converted into a format compatible with embroidery machines. This conversion process is known as digitization, and it’s essential for transforming any embroidery design you plan to use.

For those designing their own embroidery patterns, the next step is to digitize your creation. This involves submitting your design files in a vector format, such as AI or PDF, although a high-resolution PNG file can also suffice. The digitization service will then convert your design for a one-time fee, preparing it for the embroidery process.

It’s important to note that not all embroidery digitization files are created equal. Files digitized for one machine may not be compatible with another, so it’s crucial to ensure your files are adjusted or created to meet the specific requirements of the embroidery service you’re using.

To ensure your embroidery design meets your expectations, consider ordering a sample of your product. Many services offer a discount for sample orders, allowing you to see the finished product before committing to a larger order. Blankstyle’s sample orders for embroidery start at 12 units. This step is highly recommended to guarantee the quality and accuracy of your embroidery design.

How to Make Embroidery Designs?

As you can see, there’s a lot of ways to make embroidery designs. Creating custom embroidery designs is an exciting way to express your creativity and personalize your projects. With tools like Canva and Photoshop, getting started is easier than ever. Whether you’re aiming for free embroidery designs to share with the community or specific projects like flower embroidery, the key is to begin with simple designs and gradually explore more complex patterns as your confidence grows. So, to answer the question, how to make embroidery designs? Well, it’s easier than ever considering all the online and in person tools. Happy designing!

How to Remove Embroidery 2 powerful insights

Wholesale Embroidery Transformation: How to Remove and Replace with Style


Embroidery has long been the hallmark of personalized apparel, but what if you’ve found yourself in the wholesale business, armed with garments that need a fresh start? How to remove embroidery? Whether it’s due to an outdated logo, a change in branding, or a desire to give your products a new lease of life, knowing how to remove embroidery is an invaluable skill. In this article, we will delve into the art of embroidery removal from a wholesale perspective, with a twist – we’ll explore not just how to remove embroidery, but also why it might be a smart move to replace it with something even better.

The Wholesale Embroidery Landscape

How\ to Remove EmbroideryBefore we dive into the removal process, let’s set the stage. In the wholesale world, garments often need a transformation to meet evolving market demands. This might involve rebranding, refreshing product lines, or simply staying on-trend. Here, embroidery removal becomes a pivotal step in this transformation journey.

Gather Your Tools for Wholesale Success

To embark on your wholesale embroidery journey, ensure you have the following tools at your disposal:

With these tools, you’re poised for efficient embroidery removal.

1- How to Remove Embroidery

  • Place the garment flat on your workspace.
  • Use your trusted embroidery scissors or seam ripper to carefully cut the embroidery threads. Take care to avoid damaging the fabric beneath.
  • After cutting, employ tweezers to gently extract any lingering loose threads.
  • If the removal leaves behind small holes or marks, use a matching thread and needle to expertly mend them. This step ensures a flawless foundation for what’s to come.

2 – The Art of Wholesale Embroidery Replacement

Now, let’s introduce an intriguing concept. Instead of leaving your garment plain after removing the embroidery, consider this: why not replace it with something new? A larger, more captivating embroidery could be the perfect solution to cover any remnants of the previous design.

Reimagine with a Fresh Embroidery

  • Choose a design that aligns with your wholesale goals and brand evolution.
  • Ensure the new embroidery is slightly larger than the previous one to conceal any traces effectively.
  • Employ your embroidery skills or seek professional services to apply the fresh design.
  • Marvel at the transformed garment, now ready to captivate your wholesale customers with its renewed appeal.

Final Thoughts on Wholesale Embroidery Mastery

In the dynamic world of wholesale, flexibility and innovation are essential. Mastering the skill of removing and replacing embroidery can give your products a competitive edge. Reinvent your garments with new, bold embroidery designs to not only conceal the old but to also give them a fresh, market-ready appeal. Each revamped piece is a chance to leave a memorable impact in the industry. Want to ensure perfection right from the start? Explore our embroidery services, complete with a full design team, to avoid the disappointment of designs that don’t meet your expectations.

Elevate Your Wholesale Game

Dive into the transformative power of wholesale embroidery with ease and creativity. Searching for the ideal wholesale garments to showcase your embroidery artistry? Transform garments that once featured outdated logos into stunning showcases of your brand’s progress. Perfecting the skill of embroidery removal and reapplication sets you up for success in the dynamic wholesale market. It’s not just about erasing the old; it’s about reinventing it. Elevate your products to new heights with innovative embroidery that makes them stand out in the crowd.

Bulk Buying for December: Your Early-Bird guide to Holiday Shopping


The chill in the air, the gentle hum of festive tunes on the radio, and the anticipation of joyful celebrations around the corner. December is that magical month we all look forward to. But, if you’re a business or brand, December also comes with its fair share of hustle and bustle—particularly when it comes to ensuring your apparel stocks are full and ready to meet the holiday demand. Bulk buying just got easier than ever with Blankstyle!

Blankstyle is here with some pearls of wisdom to help you navigate the world of bulk buying so you can be fully prepared for December. Here’s our comprehensive guide:

1. Understand the Advantages of Early Bulk Buying

As the old saying goes, “The early bird catches the worm.” In the world of apparel, the early shopper nabs the best deals, the most diverse inventory, and ensures timely delivery. Given the logistical challenges and heightened demand that often accompany the end-of-year rush, early purchasing is a strategic move that guarantees peace of mind.

Discounted Prices: Buying in bulk earlier can often net you some fantastic deals. With holiday sales and promotions kicking in, getting your orders in before the rush can lead to significant savings.

Avoid Last-Minute Panic: Trust us; the last thing you want is to be scrambling for stock when the holiday rush is in full swing. Purchasing early ensures you’re well-prepared and can focus on other aspects of your business.

2. Know Your Inventory Needs

Understanding the scale of your requirements is pivotal. Look at your sales or attendance data from the previous year, account for any growth or changes, and use this to project your needs. If you’re planning an event or corporate giveaway, getting a close estimate on numbers will prevent overstocking or coming up short.

Estimate the Demand: Based on past sales data and current trends, get a rough idea of the quantity of each item you’ll need.

Factor in Lead Times: Remember, every supplier, including us at Blankstyle, has lead times. By purchasing early, you’re ensuring that you receive your products well before they’re needed.

3. Dive into Trend Analysis

Stay Updated: Keep an eye on fashion and apparel trends for the winter season. By purchasing trending items in bulk, you set yourself up for higher sales.

Ask Us! At Blankstyle, we have our finger on the pulse of what’s hot and what’s not. Don’t hesitate to reach out for recommendations. For example, our popular brand new Los Angeles Apparel 1807GD crewneck sweatshirt is sure to be a fan-favorite amongst your customers.

4. Optimize Storage Solutions

Check Storage Space: Before placing large orders, ensure you have enough space to store the items. This prevents any potential damage and maintains the quality of the apparel.

Organize Efficiently: Having a system where items are easily accessible can speed up processing times when orders start flooding in.

5. Consider Customization and Branding

If you’re looking to add personalized touches – be it branding, event details, or festive designs – remember that customization requires time. By ordering early, you’re allocating ample time for design approvals, production, and any revisions that might be needed.

Plan Ahead: If you’re looking to customize the apparel with printing or embroidery, remember that this adds an additional step in your prep process. Factor in the time it will take to get these customizations done.

Quality Check: Always order a sample first to check the quality of the customization before placing a bulk order. Want a little more info and advice about placing a custom order? Check out our decoration info page.

6. Take Advantage of Blankstyle’s Bulk Pricing Program

No account? No problem! Our Bulk Pricing Program offers discounted prices on large orders, ensuring you get the best value for your money.

7. Remember the Return Policy

Always familiarize yourself with the return policies of suppliers. At Blankstyle, we prioritize customer satisfaction, but it’s always good to be informed about return and exchange policies.

Wrap Up

December might be the season of joy and giving, but it’s also the season of sales and smart business decisions. By planning ahead and making the most of early bulk buying, you’re not only ensuring smooth business operations but also maximizing profits and customer satisfaction.

Perhaps the most significant advantage of early bulk buying is the peace of mind it brings. With your December stock secured in November, you can focus on other aspects of your business or event, ensuring everything runs smoothly and efficiently.

So, as you sip on that pumpkin spice latte and draft your holiday strategies, remember that Blankstyle has got your back, every step of the way. Happy bulk buying and here’s to a prosperous December!


Stitch Count Estimator – The Perfect Tool for any Creator

Embroidery, while intricate and beautiful, comes with its own set of challenges, especially when it comes to cost estimation. Often, customers find themselves in a conundrum, trying to figure out how much their dream design might set them back. Enter Blankstyle’s Stitch Count Estimator – a tool that promises to simplify this process.

Embroidery Costs & Stitch Count: Understanding the Connection

The cost of embroidery hinges on several factors, but stitch count stands out as a pivotal determinant. Simply put, the more stitches your design requires, the higher the cost – it’s a reflection of the intricacy and time involved in bringing your design to life. Thankfully, with the advent of tools like the stitch count estimator on blankstyle.com, users can now get an instant quote, providing a clearer picture of potential expenses.

If you’re curious about the number of stitches your logo might entail, simply use our tool. All it requires is for you to upload your logo, and voilà! You’ll receive a stitch count estimation almost instantly.

The Science Behind Stitch Count Estimation

Embroidering isn’t as simple as feeding a design into a machine. First, the artwork must be digitized, a process that translates your design into a language the embroidery machine understands – in stitches. This digitization determines the time, material, and therefore cost, of your embroidery. However, true digitization is an art form, involving time and costs, making it impractical for mere estimations. Hence, stitch count estimation, or educated guessing, comes into play.

Traditional Estimation vs. The New Age Tool

While our tool offers an instant solution, some might wonder about traditional methods. One such method involves “The Grid.”

  1. Printing the Grid: First, get a printout of the grid from here, which acts as your guide.
  2. Artwork Placement: Trim your artwork and superimpose it onto the grid, ensuring a perfect alignment.
  3. Counting Grid Squares: Next, count the grid squares your design occupies. Accuracy is essential for an on-point estimate.
  4. Consult the Stitch Count Chart: Use the chart provided to correlate the number of grid squares to a potential stitch count.
  5. Design Extensions: If your logo surpasses the grid, estimate the extra grid space and add this to your initial count.

However, this method has its flaws. Different logos, even of the same size, can vary significantly in stitch counts due to density differences. That’s where the Blankstyle Stitch Count Estimator offers an edge – providing a more accurate estimate digitally.

Factors to Consider for Accurate Estimation

  • Solid Inch Equivalents: Typically, a solid square inch of embroidery equals about 2,000 stitches.
  • Quarter-Inch Estimation: A quarter-inch of solid embroidery approximates to 125 stitches.
  • Letter Size: No letter should be below 3/16″ in height, with each quarter-inch height requiring about 100 stitches.
  • Drop Shadows & Lines: These can add around 200 stitches per inch.
  • Material Factors: Fabric type, color nuances, and design intricacies can sway the stitch count.

Final Thoughts

With Blankstyle’s Stitch Count Estimator, gone are the days of ambiguous embroidery cost estimations. This user-friendly tool, combined with the knowledge provided above, ensures you’re well-equipped to make informed decisions about your next embroidery project. Happy embroidering!

Blankstyle’s New Tool: The Stitch Count Estimator

Embroidery, while intricate and beautiful, comes with its own set of challenges, especially when it comes to cost estimation. Often, customers find themselves in a conundrum, trying to figure out how much their dream design might set them back. Enter Blankstyle’s Stitch Count Estimator – a tool that promises to simplify this process.

Embroidery Costs & Stitch Count: Understanding the Connection

The cost of embroidery hinges on several factors, but stitch count stands out as a pivotal determinant. Simply put, the more stitches your design requires, the higher the cost – it’s a reflection of the intricacy and time involved in bringing your design to life. Thankfully, with the advent of tools like the stitch count estimator on blankstyle.com, users can now get an instant quote, providing a clearer picture of potential expenses.

If you’re curious about the number of stitches your logo might entail, simply use our tool. All it requires is for you to upload your logo, and voilà! You’ll receive a stitch count estimation almost instantly.

The Science Behind Stitch Count Estimation

Embroidering isn’t as simple as feeding a design into a machine. First, the artwork must be digitized, a process that translates your design into a language the embroidery machine understands – in stitches. This digitization determines the time, material, and therefore cost, of your embroidery. However, true digitization is an art form, involving time and costs, making it impractical for mere estimations. Hence, stitch count estimation, or educated guessing, comes into play.

Traditional Estimation vs. The New Age Tool

While our tool offers an instant solution, some might wonder about traditional methods. One such method involves “The Grid.”

  1. Printing the Grid: First, get a printout of the grid from here, which acts as your guide.
  2. Artwork Placement: Trim your artwork and superimpose it onto the grid, ensuring a perfect alignment.
  3. Counting Grid Squares: Next, count the grid squares your design occupies. Accuracy is essential for an on-point estimate.
  4. Consult the Stitch Count Chart: Use the chart provided to correlate the number of grid squares to a potential stitch count.
  5. Design Extensions: If your logo surpasses the grid, estimate the extra grid space and add this to your initial count.

However, this method has its flaws. Different logos, even of the same size, can vary significantly in stitch counts due to density differences. That’s where the Blankstyle Stitch Count Estimator offers an edge – providing a more accurate estimate digitally.

Factors to Consider for Accurate Estimation

  • Solid Inch Equivalents: Typically, a solid square inch of embroidery equals about 2,000 stitches.
  • Quarter-Inch Estimation: A quarter-inch of solid embroidery approximates to 125 stitches.
  • Letter Size: No letter should be below 3/16″ in height, with each quarter-inch height requiring about 100 stitches.
  • Drop Shadows & Lines: These can add around 200 stitches per inch.
  • Material Factors: Fabric type, color nuances, and design intricacies can sway the stitch count.

Final Thoughts

With Blankstyle’s Stitch Count Estimator, gone are the days of ambiguous embroidery cost estimations. This user-friendly tool, combined with the knowledge provided above, ensures you’re well-equipped to make informed decisions about your next embroidery project. Happy embroidering!

Richardson 112 Hats at Wholesale Prices: Blank or With Logo Embroidery


If you’re looking for custom Richardson 112 hats, look no further! We offer hats that can be embroidered with your company logo or any other design you might want. We also offer Richardson 112 hats in bulk, so if you’re looking for a wholesale order, we can help you out.

Grey Richardson 112 trucker hat with navy mesh back showcasing custom embroidered initials B and S in white thread

If you’re in the custom apparel business, you know that Richardson Hats are some of the best in the industry. The 112 Adjustable Snapback Trucker Cap is a great option for those looking for a branded hat that is both stylish and comfortable. Made from 60% cotton, 40% Polyester, this cap features an adjustable snapback closure and a pre-curved visor. It’s available in a variety of colors, so you can find the perfect match for your brand. Best of all, it’s priced competitively for wholesale orders.

Order Richardson 112 hats wholesale with a custom logo or blank and you’ll get a great-looking hat that’s perfect for sports teams, outdoor crews, or anyone who wants a stylish, comfortable hat that fits well. The cotton sweatband and nylon mesh back make it a great option for active people, while the structured, six-panel front with mesh backing ensures a comfortable fit no matter what you’re doing.

Solid color options have matching visor stitching while split and tri-color options feature 8 rows of contrasting stitching on the visor. Richardson 112 hats offer a mid-profile height making them a great fit for most people, and the gently pre-curved visor means that both curved bill devotees and flat bill fans on your team will be well pleased.

Custom charcoal grey Richardson 112 snapback trucker hat with bright pink mesh back embroidered with logo in pink thread spelling the word COOL

Do you have a Richardson 112 hat in your lineup? If not, you’re missing out on one of the bestselling designs in the industry. With a classic trucker style and high-quality construction, the Richardson 112 hats are a must-have for any business looking to outfit their team in style. Choose from a variety of colors to find the perfect match for your brand, and add your custom logo with our embroidery service. Order today and you’ll be able to take advantage of our low wholesale prices.

So what are you waiting for? Your team will love the look and feel of these hats, and you’ll love the fact that they’re affordable, high-quality, and easy to brand with your logo. Contact us today to get started.