Bulk Buying for December: Your Early-Bird guide to Holiday Shopping


The chill in the air, the gentle hum of festive tunes on the radio, and the anticipation of joyful celebrations around the corner. December is that magical month we all look forward to. But, if you’re a business or brand, December also comes with its fair share of hustle and bustle—particularly when it comes to ensuring your apparel stocks are full and ready to meet the holiday demand. Bulk buying just got easier than ever with Blankstyle!

Blankstyle is here with some pearls of wisdom to help you navigate the world of bulk buying so you can be fully prepared for December. Here’s our comprehensive guide:

1. Understand the Advantages of Early Bulk Buying

As the old saying goes, “The early bird catches the worm.” In the world of apparel, the early shopper nabs the best deals, the most diverse inventory, and ensures timely delivery. Given the logistical challenges and heightened demand that often accompany the end-of-year rush, early purchasing is a strategic move that guarantees peace of mind.

Discounted Prices: Buying in bulk earlier can often net you some fantastic deals. With holiday sales and promotions kicking in, getting your orders in before the rush can lead to significant savings.

Avoid Last-Minute Panic: Trust us; the last thing you want is to be scrambling for stock when the holiday rush is in full swing. Purchasing early ensures you’re well-prepared and can focus on other aspects of your business.

2. Know Your Inventory Needs

Understanding the scale of your requirements is pivotal. Look at your sales or attendance data from the previous year, account for any growth or changes, and use this to project your needs. If you’re planning an event or corporate giveaway, getting a close estimate on numbers will prevent overstocking or coming up short.

Estimate the Demand: Based on past sales data and current trends, get a rough idea of the quantity of each item you’ll need.

Factor in Lead Times: Remember, every supplier, including us at Blankstyle, has lead times. By purchasing early, you’re ensuring that you receive your products well before they’re needed.

3. Dive into Trend Analysis

Stay Updated: Keep an eye on fashion and apparel trends for the winter season. By purchasing trending items in bulk, you set yourself up for higher sales.

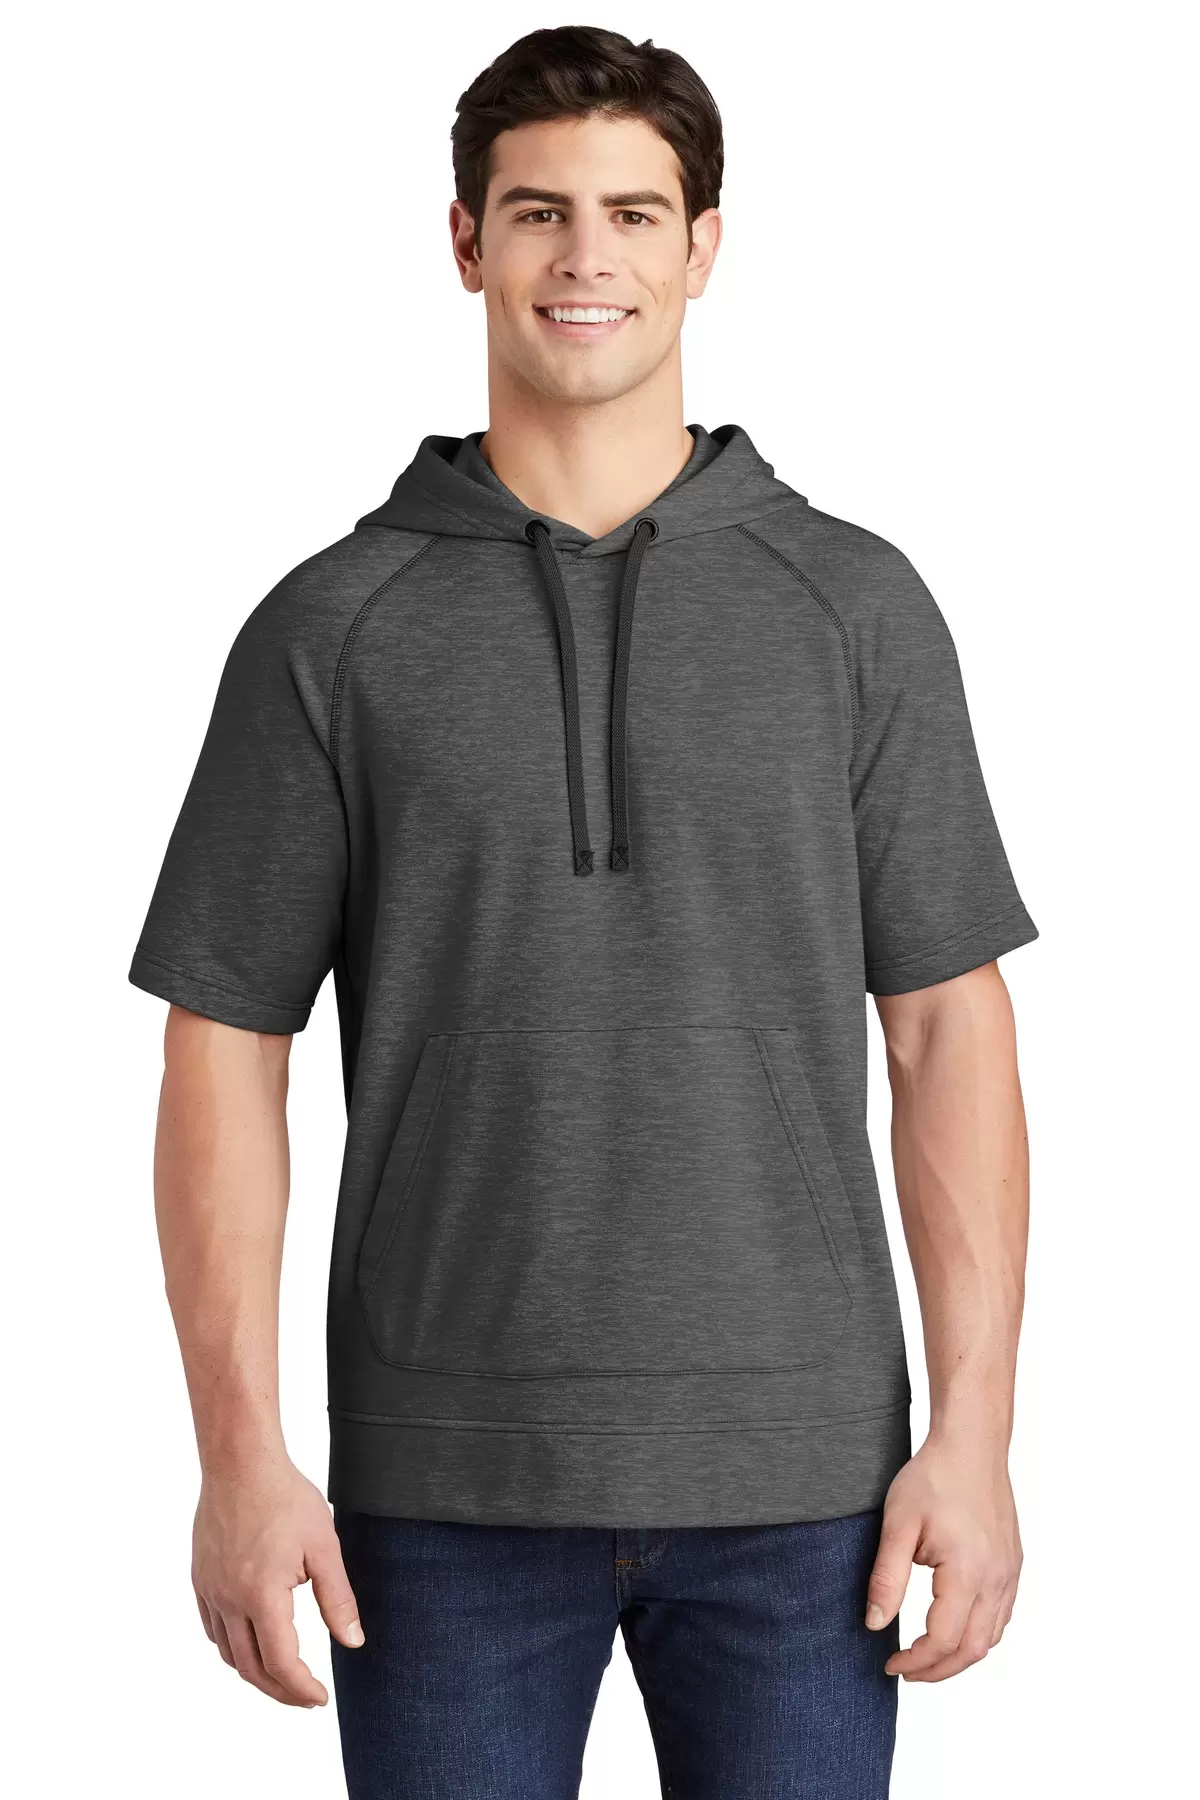
Ask Us! At Blankstyle, we have our finger on the pulse of what’s hot and what’s not. Don’t hesitate to reach out for recommendations. For example, our popular brand new Los Angeles Apparel 1807GD crewneck sweatshirt is sure to be a fan-favorite amongst your customers.

4. Optimize Storage Solutions

Check Storage Space: Before placing large orders, ensure you have enough space to store the items. This prevents any potential damage and maintains the quality of the apparel.

Organize Efficiently: Having a system where items are easily accessible can speed up processing times when orders start flooding in.

5. Consider Customization and Branding

If you’re looking to add personalized touches – be it branding, event details, or festive designs – remember that customization requires time. By ordering early, you’re allocating ample time for design approvals, production, and any revisions that might be needed.

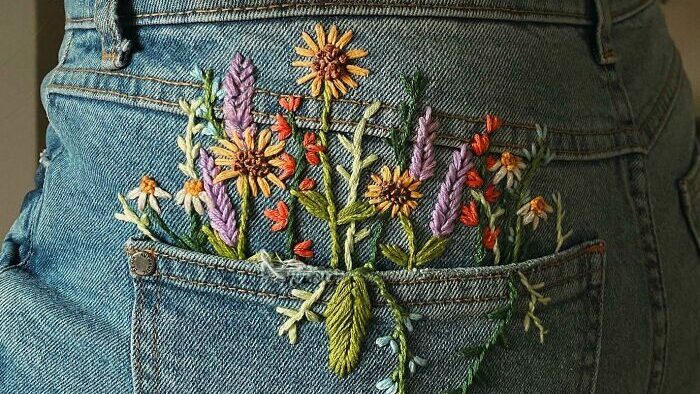
Plan Ahead: If you’re looking to customize the apparel with printing or embroidery, remember that this adds an additional step in your prep process. Factor in the time it will take to get these customizations done.

Quality Check: Always order a sample first to check the quality of the customization before placing a bulk order. Want a little more info and advice about placing a custom order? Check out our decoration info page.

6. Take Advantage of Blankstyle’s Bulk Pricing Program

No account? No problem! Our Bulk Pricing Program offers discounted prices on large orders, ensuring you get the best value for your money.

7. Remember the Return Policy

Always familiarize yourself with the return policies of suppliers. At Blankstyle, we prioritize customer satisfaction, but it’s always good to be informed about return and exchange policies.

Wrap Up

December might be the season of joy and giving, but it’s also the season of sales and smart business decisions. By planning ahead and making the most of early bulk buying, you’re not only ensuring smooth business operations but also maximizing profits and customer satisfaction.

Perhaps the most significant advantage of early bulk buying is the peace of mind it brings. With your December stock secured in November, you can focus on other aspects of your business or event, ensuring everything runs smoothly and efficiently.

So, as you sip on that pumpkin spice latte and draft your holiday strategies, remember that Blankstyle has got your back, every step of the way. Happy bulk buying and here’s to a prosperous December!


Stitch Count Estimator – The Perfect Tool for any Creator

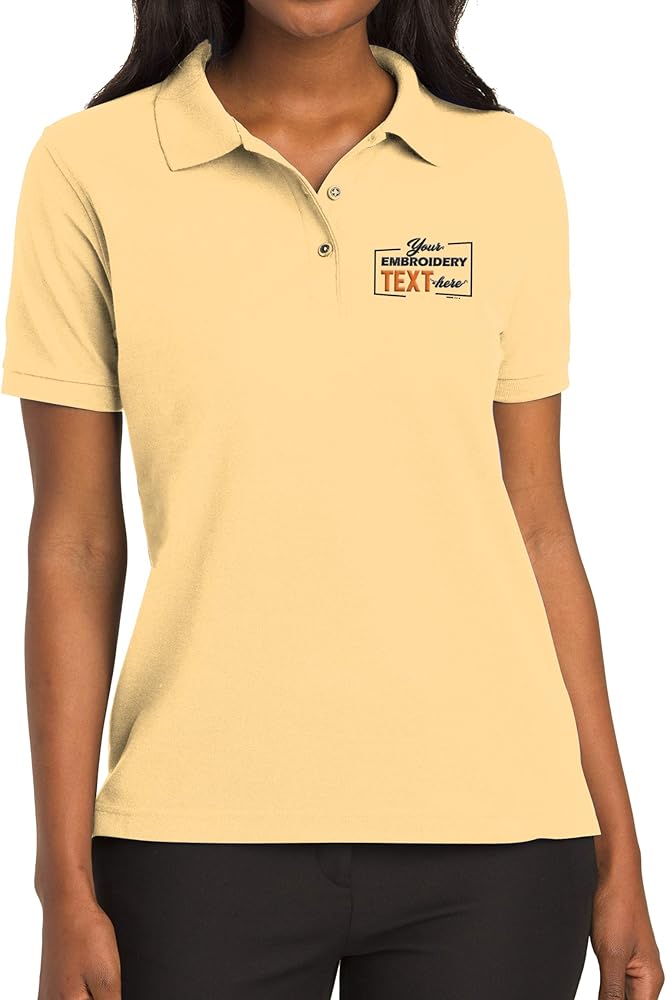
Embroidery, while intricate and beautiful, comes with its own set of challenges, especially when it comes to cost estimation. Often, customers find themselves in a conundrum, trying to figure out how much their dream design might set them back. Enter Blankstyle’s Stitch Count Estimator – a tool that promises to simplify this process.

Embroidery Costs & Stitch Count: Understanding the Connection

The cost of embroidery hinges on several factors, but stitch count stands out as a pivotal determinant. Simply put, the more stitches your design requires, the higher the cost – it’s a reflection of the intricacy and time involved in bringing your design to life. Thankfully, with the advent of tools like the stitch count estimator on blankstyle.com, users can now get an instant quote, providing a clearer picture of potential expenses.

If you’re curious about the number of stitches your logo might entail, simply use our tool. All it requires is for you to upload your logo, and voilà! You’ll receive a stitch count estimation almost instantly.

The Science Behind Stitch Count Estimation

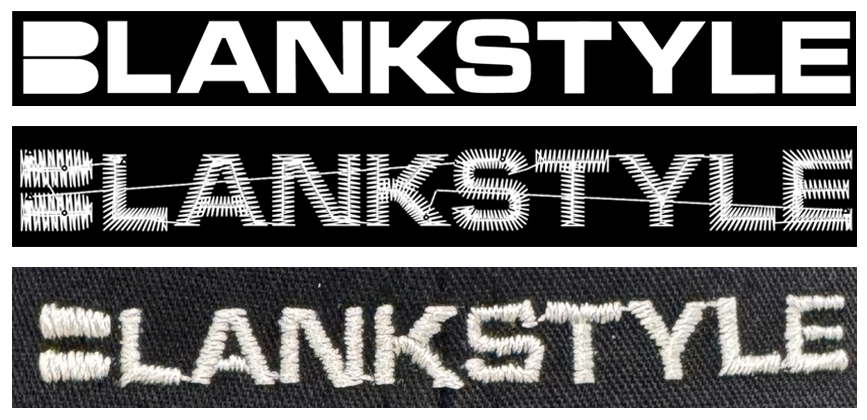
Embroidering isn’t as simple as feeding a design into a machine. First, the artwork must be digitized, a process that translates your design into a language the embroidery machine understands – in stitches. This digitization determines the time, material, and therefore cost, of your embroidery. However, true digitization is an art form, involving time and costs, making it impractical for mere estimations. Hence, stitch count estimation, or educated guessing, comes into play.

Traditional Estimation vs. The New Age Tool

While our tool offers an instant solution, some might wonder about traditional methods. One such method involves “The Grid.”

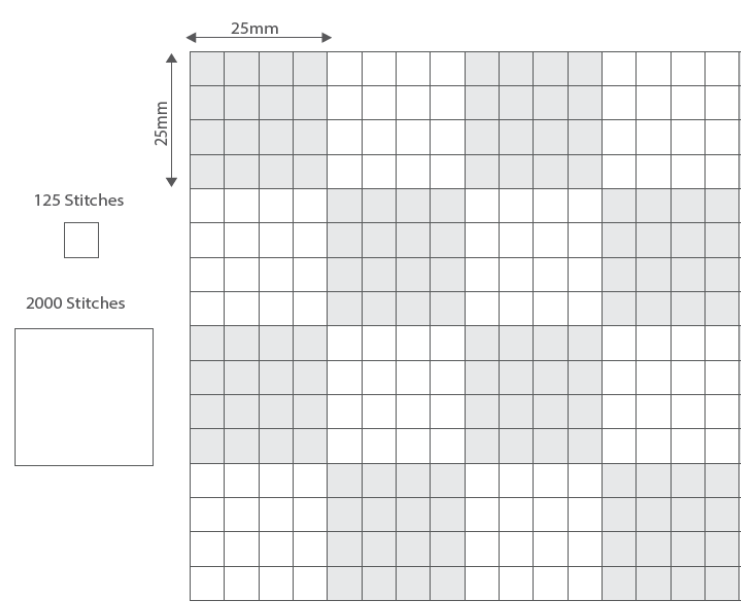
  1. Printing the Grid: First, get a printout of the grid from here, which acts as your guide.
  2. Artwork Placement: Trim your artwork and superimpose it onto the grid, ensuring a perfect alignment.
  3. Counting Grid Squares: Next, count the grid squares your design occupies. Accuracy is essential for an on-point estimate.
  4. Consult the Stitch Count Chart: Use the chart provided to correlate the number of grid squares to a potential stitch count.
  5. Design Extensions: If your logo surpasses the grid, estimate the extra grid space and add this to your initial count.

However, this method has its flaws. Different logos, even of the same size, can vary significantly in stitch counts due to density differences. That’s where the Blankstyle Stitch Count Estimator offers an edge – providing a more accurate estimate digitally.

Factors to Consider for Accurate Estimation

  • Solid Inch Equivalents: Typically, a solid square inch of embroidery equals about 2,000 stitches.
  • Quarter-Inch Estimation: A quarter-inch of solid embroidery approximates to 125 stitches.
  • Letter Size: No letter should be below 3/16″ in height, with each quarter-inch height requiring about 100 stitches.
  • Drop Shadows & Lines: These can add around 200 stitches per inch.
  • Material Factors: Fabric type, color nuances, and design intricacies can sway the stitch count.

Final Thoughts

With Blankstyle’s Stitch Count Estimator, gone are the days of ambiguous embroidery cost estimations. This user-friendly tool, combined with the knowledge provided above, ensures you’re well-equipped to make informed decisions about your next embroidery project. Happy embroidering!

Blankstyle’s New Tool: The Stitch Count Estimator

Embroidery, while intricate and beautiful, comes with its own set of challenges, especially when it comes to cost estimation. Often, customers find themselves in a conundrum, trying to figure out how much their dream design might set them back. Enter Blankstyle’s Stitch Count Estimator – a tool that promises to simplify this process.

Embroidery Costs & Stitch Count: Understanding the Connection

The cost of embroidery hinges on several factors, but stitch count stands out as a pivotal determinant. Simply put, the more stitches your design requires, the higher the cost – it’s a reflection of the intricacy and time involved in bringing your design to life. Thankfully, with the advent of tools like the stitch count estimator on blankstyle.com, users can now get an instant quote, providing a clearer picture of potential expenses.

If you’re curious about the number of stitches your logo might entail, simply use our tool. All it requires is for you to upload your logo, and voilà! You’ll receive a stitch count estimation almost instantly.

The Science Behind Stitch Count Estimation

Embroidering isn’t as simple as feeding a design into a machine. First, the artwork must be digitized, a process that translates your design into a language the embroidery machine understands – in stitches. This digitization determines the time, material, and therefore cost, of your embroidery. However, true digitization is an art form, involving time and costs, making it impractical for mere estimations. Hence, stitch count estimation, or educated guessing, comes into play.

Traditional Estimation vs. The New Age Tool

While our tool offers an instant solution, some might wonder about traditional methods. One such method involves “The Grid.”

  1. Printing the Grid: First, get a printout of the grid from here, which acts as your guide.
  2. Artwork Placement: Trim your artwork and superimpose it onto the grid, ensuring a perfect alignment.
  3. Counting Grid Squares: Next, count the grid squares your design occupies. Accuracy is essential for an on-point estimate.
  4. Consult the Stitch Count Chart: Use the chart provided to correlate the number of grid squares to a potential stitch count.
  5. Design Extensions: If your logo surpasses the grid, estimate the extra grid space and add this to your initial count.

However, this method has its flaws. Different logos, even of the same size, can vary significantly in stitch counts due to density differences. That’s where the Blankstyle Stitch Count Estimator offers an edge – providing a more accurate estimate digitally.

Factors to Consider for Accurate Estimation

  • Solid Inch Equivalents: Typically, a solid square inch of embroidery equals about 2,000 stitches.
  • Quarter-Inch Estimation: A quarter-inch of solid embroidery approximates to 125 stitches.
  • Letter Size: No letter should be below 3/16″ in height, with each quarter-inch height requiring about 100 stitches.
  • Drop Shadows & Lines: These can add around 200 stitches per inch.
  • Material Factors: Fabric type, color nuances, and design intricacies can sway the stitch count.

Final Thoughts

With Blankstyle’s Stitch Count Estimator, gone are the days of ambiguous embroidery cost estimations. This user-friendly tool, combined with the knowledge provided above, ensures you’re well-equipped to make informed decisions about your next embroidery project. Happy embroidering!

Logo Placement Tips

The Art of Logo Placement: Maximizing Impact on Customized Clothing

Logo placement is a crucial aspect in the world of customized clothing. It is an art that, when executed well, can elevate the appeal of apparel and significantly enhance brand recognition. Subsequently, Blankstyle understands this intricate dance, offering insights into maximizing the impact of logo placement.

Front Logo Placement – The First Impression

Pictured is our Comfort Colors T-Shirts 3023CL Women’s Heavyweight Boxy T-Shirt

Firstly, the front of the shirt offers the immediate visibility that can either make or break the initial impression of the apparel. Chiefly, logos placed here are prominently displayed, instilling professionalism and aiding in brand recall. Different areas of the front offer varied effects:

  • Left Chest: Known for its classic and professional appeal, enhancing visibility while maintaining a sophisticated aesthetic.
  • Right Chest: A touch of creativity and a break from tradition, appealing to the minimalist and the modern.
  • Center Chest: A bold statement of brand identity, ensuring the logo is the focal point.
  • Full Front: For those looking to make an audacious statement, ideal for events where visibility is paramount.
  • Oversized Front: A modern, fearless approach, portraying confidence and a strong brand identity.

Exploring the Back

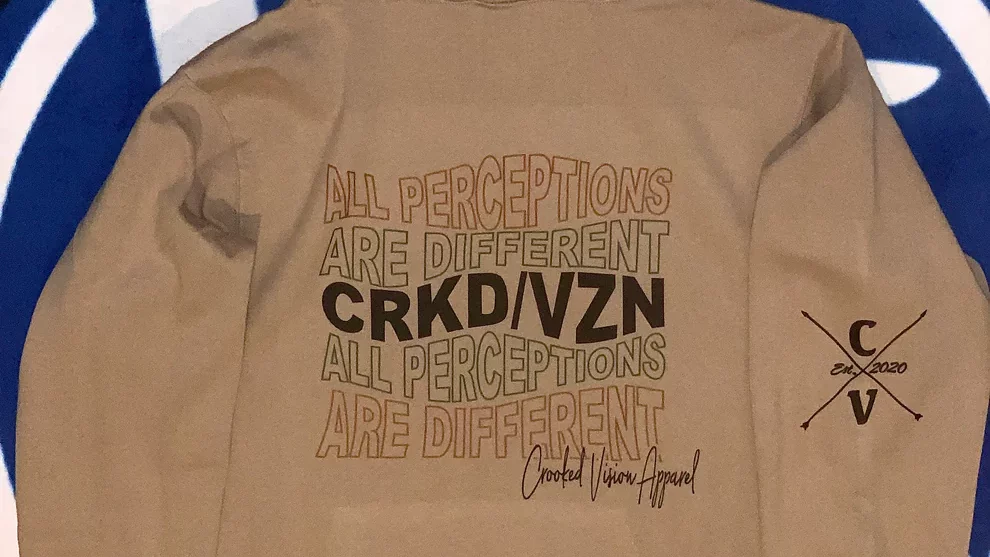
Pictured is the Cotton Heritage M2580 PREMIUM PULLOVER HOODIE

Evidently, while the front of the shirt captures immediate attention, the back is where subtle yet powerful branding can be implemented.

  • Collar Logo: A subtle statement that speaks to attention to detail and elegance.
  • Back Collar: An unexpected focal point that adds an element of surprise and intrigue.
  • Upper Back: Combines prominence with subtlety for a memorable branding impact.
  • Full Back: For a bold, unmissable statement of brand identity.

Logo Placement on Hoods and Sleeves

In addition, hoods and sleeves offer alternative canvases for brands looking to break from the norm.

  • The Hood: Ensuring brand visibility whether the hood is up or down, it’s an unexpected yet stylish choice.
  • Sleeves: A subtle yet impactful option for those looking to avoid the conventional while maintaining elegance.

Deciphering the Perfect Logo Size

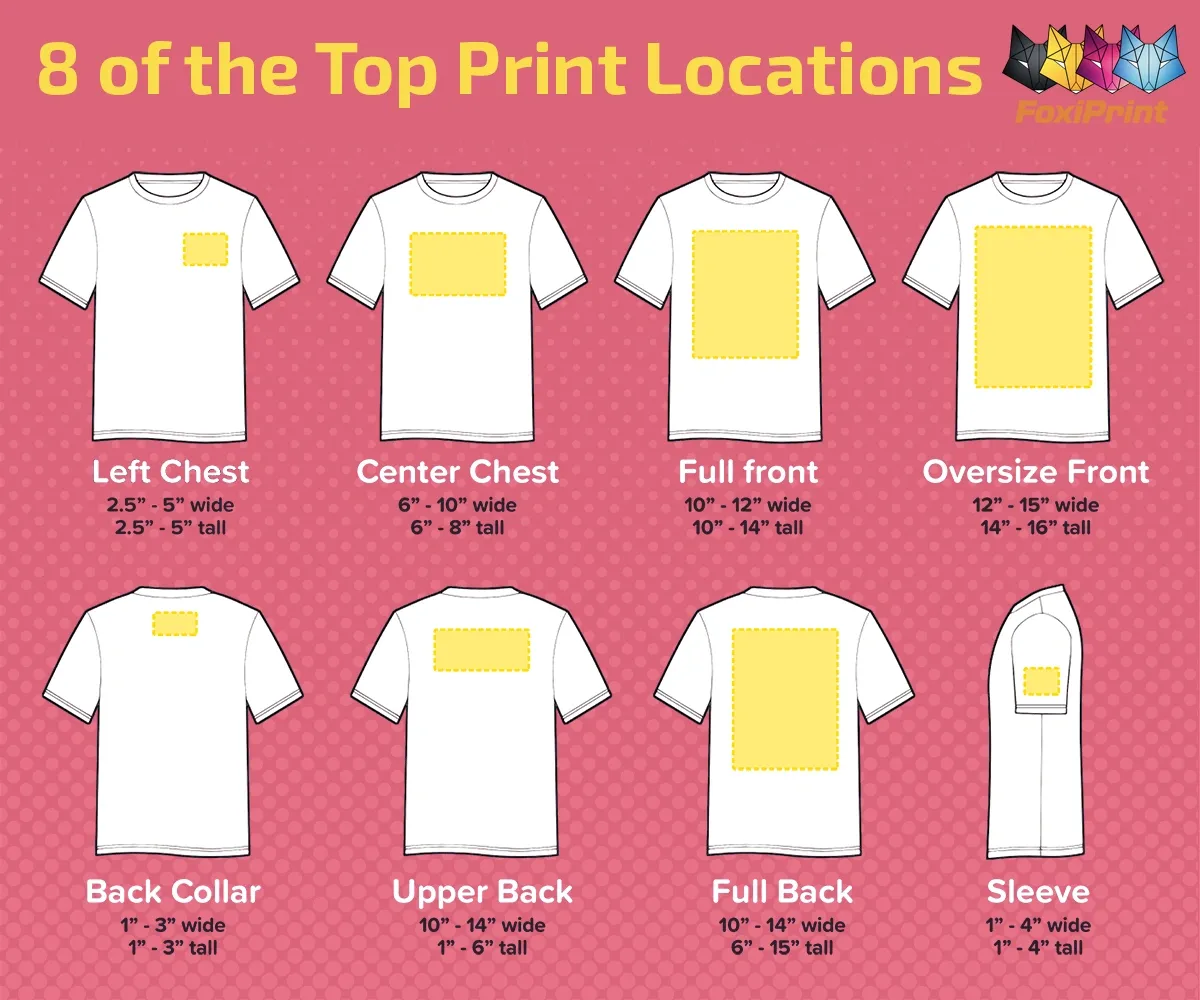
Henceforth, every piece of apparel has its unique dimensions. To ensure the logo complements the design, taking into account the logo’s size and position is essential. In effect, different areas like the left chest, center chest, and full front require meticulous sizing considerations to strike the perfect balance between visibility and aesthetic appeal.

Size chart reference

Placement widthheightImportant points
Left Chest2.5”- 5”2.5”- 5”Because of the smaller print area, left logo placement on shirt works best for simple logos.

Moreover, If your logo has a high-contrast design that pops, left chest logo placement could work beautifully

You can use this classic area for T shirt logo placement for employees, and giveaways – all thanks to its subtle experience.
Center Chest6”- 10”6”- 8”Placing a logo at the center of the chest ensures maximum visibility since it’s at eye level for most people.

The center chest shirt logo placement provides a balanced and symmetrical look, which is visually appetizing.

Additionally, It’s a versatile placement option suitable for both women’s and men’s shirts and a widely accepted location for branding shirts.
Full Front10”- 12”10”- 14”A full front logo placement on shirt guarantees maximum visibility and draws attention to the branding or design.

It creates a bold and impactful statement, making it suitable for designs demanding attention or wanting to make a strong impression.

A front logo placement on shirt is best for variations such as sweatshirts, T-shirts, hoodies, and other casual promotional items.
Oversize Front12”- 15”14”- 16”The oversized placement of logo on front of shirt creates a bold statement. If you are aiming to stand out in the market with your logo designs, this is the one.

If you want to distribute some really cool corporate branded wear to your employees and customers, oversize front logos can help you by adding a modern and trendy aesthetic.

An oversized logo is typically larger, Hence, it’s important to consider proportions and balance with the shirt’s size as well as other design elements.
Back Collar1”- 3”1”- 3”When it comes to back logo placement, the back collar is a widely used location. It offers a more subtle and discreet branding option compared to front or sleeve placements.

Placing a logo on the back collar adds a unique and distinctive detail to the shirt design, catching attention from behind.

It is associated with a more corporate or professional look, commonly seen in dress shirts and formal attire.
Upper Back10”-14”1”- 6”Logo placement on back of shirt, especially upper back, provides an easily visible and prominent location, when viewed from behind.

Upper-back logos are quite versatile. You can use them on different types of shirts including jerseys, outwear, T-shirts, and Sweatshirts.

Obviously, logo placement on T shirt and other shirts is ideal for featuring sponsor logos or displaying team names, especially in sports or event-related shirts.
Full Back10”-14”6”- 15”Full Back is the best logo placement on shirt as it gives maximum visibility and creates a significant visual impact in crowded events or environments.

Shirts having a wider back like hoodies, and T-shirts are commonly used to print full-back business logos. It’s a part of the all-over print design which covers the entire back area for a visually striking and cohesive look.

Thus, a full back shirt logo placement offers the opportunity to showcase large-scale brand logos, graphics, or designs in an impactful and creative way.
Sleeve1”- 4”1”- 4”Sleeve logo placement is a unique and stylish option to showcase branding elements like logos or taglines on a shirt.

Placing a logo on the sleeve adds significant visual interest and detail to the overall shirt design. This makes it stand out from traditional front or back placements.

Additionally, sleeve logo positions may have a smaller area compared to the front or back placements. This requires careful consideration of logo size, readability, and proportionality.

Why It Matters

All in all, every logo placement tells a story, an unspoken narrative that underscores the brand’s identity. Nonetheless, in the bustling marketplace, where standing out is as crucial as fitting in, the strategic placement of logos on customized clothing can be a game changer.

Furthermore, with Blankstyle, the art of logo placement is meticulously honed to ensure that every piece of apparel not only speaks to the quality of the garment but also resonates the brand’s identity profoundly. Obviously, each placement option is an opportunity to showcase innovation, creativity, and brand allegiance, tailored to fit diverse needs and preferences. At Blankstyle, every stitch, print, and hue is a step towards crafting apparel that’s not just worn but experienced, turning everyday clothing into a canvas of brand storytelling.

Customized Apparel: From Sketch to Shirt

Customized apparel has carved its niche as a potent tool in branding, promotions, and personal expression. A thought, a design, a doodle can all take life when imprinted on fabric. But how does a simple sketch transform into a tangible, wearable piece of art? Let’s venture into the world of Blankstyle and uncover the fascinating journey of a design from a mere concept to a finished product.

Step 1: The Blueprint of Creativity – Designing

The journey begins with a design concept. Whether it’s an intricate illustration, a simple logo, or a catchy slogan, the idea should align with the intended message or the essence of a brand. The design acts as a brand’s voice, a whisper to its audience, so it’s essential to craft it with precision, ensuring it’s versatile and compatible with varying shirt colors. If designing isn’t your forte, collaborating with a professional designer can make all the difference, ensuring your vision is meticulously articulated.

Step 2: Mapping the Quantity & Budget

Before diving deep into the production process, it’s essential to delineate the quantity and budget. For wholesalers, buying in bulk is cost-efficient. However, it’s crucial to break down the sizes, remembering to provide an inclusive size range. The final quantity impacts the chosen printing technique, with some methods being more economical for bulk orders.

Step 3: Selecting the Perfect Printing Technique

Depending on the design intricacy, color palette, and budget, one must select the optimal printing method:

  • Screen Printing: The go-to for bulk orders. Each color demands a unique screen, making it ideal for designs with limited colors.
  • Vinyl Graphics: Perfect for simple, bold graphics, especially for smaller batches.
  • Direct-to-Garment (DTG): Suitable for designs bursting with details and colors but is more aligned with smaller orders.

Step 4: Finding the Right Printing Partner

A harmonious collaboration with the right printer is paramount. At Blankstyle, we champion quality and consistency. When you entrust us with your design, we ensure it’s impeccably translated onto fabric. By either visiting us or exploring online, you can gauge our commitment to excellence, ensuring you’re aligning with a printer that values your vision.

Step 5: Fabric Selection & Shirt Type

Comfort is paramount. The choice of fabric can significantly impact the final product’s feel and durability. While 100% cotton remains a classic, blends offer versatility in texture and cost. Beyond fabric, the shirt’s cut and style should reflect the target audience’s preferences. Whether it’s a V-neck, crew-neck, or a tank top, the style should resonate with the intended wearers. Pictured to the left is our Gildan 2000 Ultra Cotton T-Shirt G200.

Step 6: Design File Submission

Once the design is finalized, it’s time to hand over the baton to us. Submit your design files, ensuring they’re in the right format (preferably vector), allowing for precision in translation from digital to fabric. Find more information on how to do that with us right on our decoration info page

Step 7: Proofing for Perfection

Before the mass printing begins, we at Blankstyle believe in getting a nod of approval. A digital proof is shared to ensure the design sits perfectly, capturing every nuance.

Step 8: The Final Transformation

Once the proofs are approved, the production wheels start churning. The design takes life, imprinting itself on fabric, ready to narrate its story. Once printed, each piece undergoes a thorough quality check, ensuring it mirrors the approved design.

The Grand Finale
With Blankstyle, the journey from a sketch to a shirt is an amalgamation of meticulous planning, artistry, and commitment to quality. As you unbox the finished shirts, you’re not just looking at fabric and ink; you’re holding a tangible manifestation of a vision, ready to resonate with its audience.

Dive into the realm of customized apparel with us, and let’s transform sketches into stories, together.

Customer Feature: DPRSD Streetwear

DPRSD Streetwear: Empowering Conversations, Breaking Stigmas

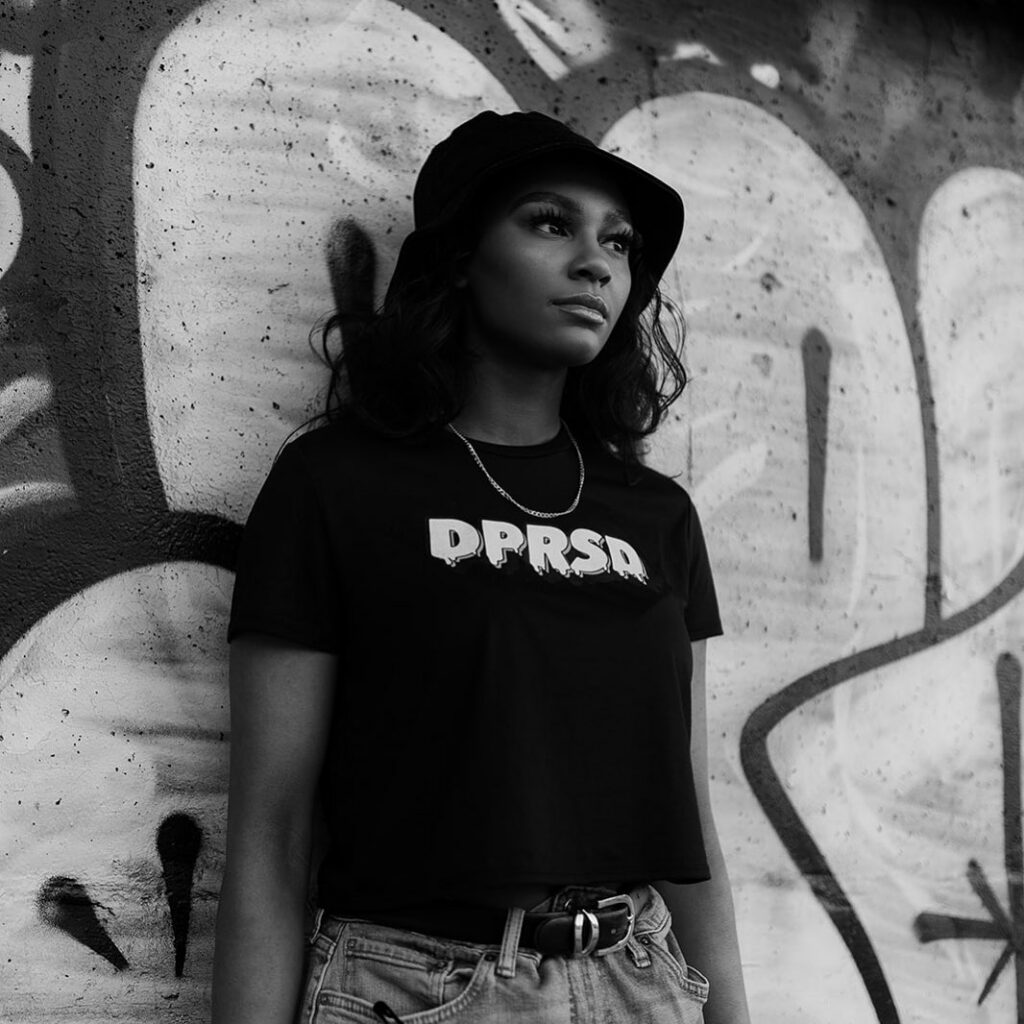
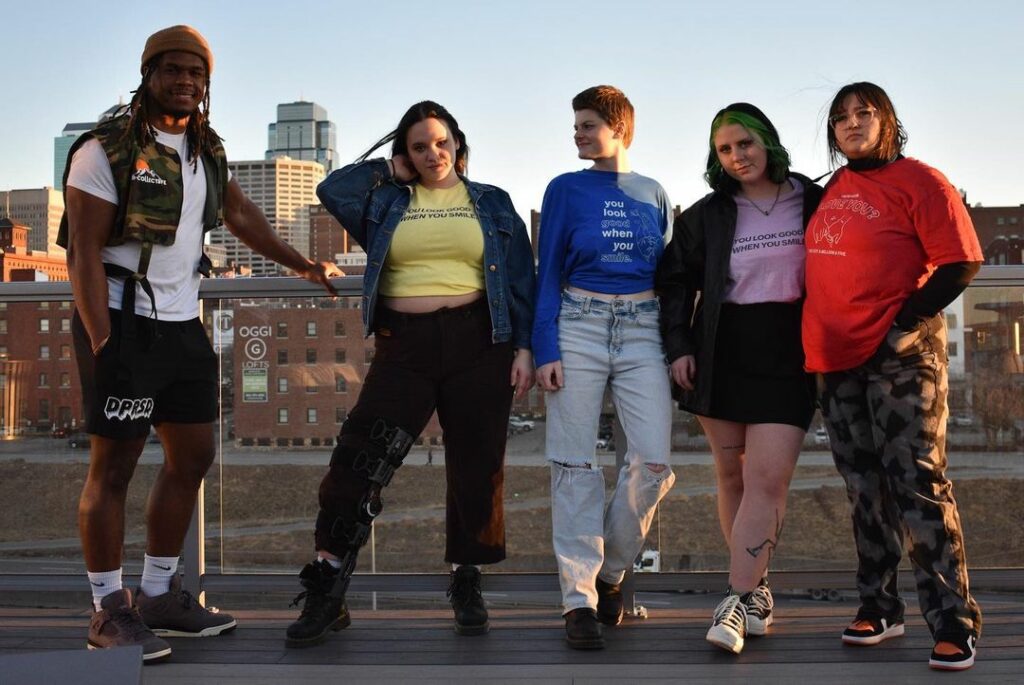
In the ever-evolving landscape of fashion, there are brands that do more than just make a style statement. DPRSD Streetwear, created in June 2022, is one such brand that aims to create a profound impact. Beyond trendy apparel, DPRSD Streetwear is on a mission to start conversations about mental health, shatter stereotypes, and build a community rooted in empathy and honesty. It’s a brand designed for those passionate about breaking mental health stigmas and fostering understanding.

A Journey Fueled by Experience:

To start, the story behind DPRSD Streetwear is deeply personal. Founder Mack Jerks has grappled with mental health challenges throughout his life, a struggle that many can relate to. For Mack, the most challenging part was starting the conversation about his inner battles. They realized that they weren’t alone in this struggle. Many people found it difficult to express what they were going through.

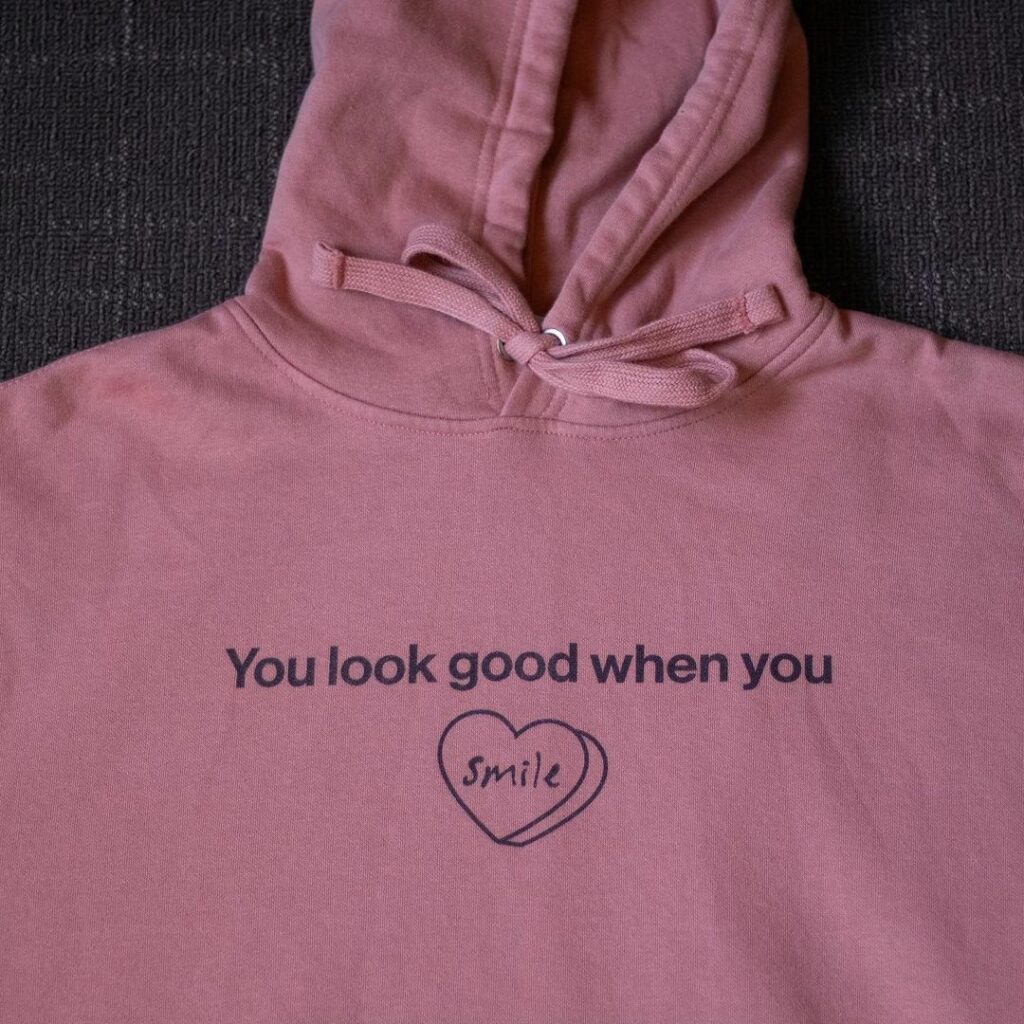
Pictured above is our Cotton Heritage M2580 PREMIUM PULLOVER HOODIE in the color Dusty Rose

Inspired by her own journey, Mack decided that clothing could be the perfect medium to communicate what they care about. Thus, DPRSD Streetwear was born—a brand that encourages open dialogue about mental health through fashion.

Inspiration in Connection and Resilience:

What fuels the heart of DPRSD Streetwear is the countless individuals who have reached out to Mack, sharing their own mental health stories and journeys. Often, these stories come from unexpected sources. They may be individuals who, on the surface, may appear to have never experienced depression, anxiety, or similar challenges. Each of these conversations serves as a powerful reminder that we are all connected and navigating our unique struggles.

Tragically, Mack has also known people who lost their battles with mental health, a stark reminder of the urgency to help others facing similar thoughts. These experiences inspire Mack to create a platform where people can openly address their struggles without shame. DPRSD Streetwear is not just about clothing; it’s a lifeline, a beacon of hope, and a reminder that there’s light on the other side of the darkness.

A Vision of Hope and Community:

To conclude, the future of DPRSD Streetwear is nothing short of inspiring. Mack envisions a robust community that serves as an open platform for anyone and everyone. The brand’s mission is to impact lives positively and remind people that no matter what they’re going through, hope and love are ever-present.

At its core, DPRSD Streetwear is about addressing mental health head-on and dismantling the shame that often surrounds issues like depression and anxiety. It’s about standing tall in the face of adversity, starting conversations that matter, and extending a helping hand to those who need it most.

DPRSD Streetwear is more than a clothing brand; it’s a movement. It’s an embodiment of resilience, a celebration of human connection, and a catalyst for change. To learn more about DPRSD Streetwear and join their mission, visit their website at www.dprsdstreetwear.com.

and follow them on social media platforms such as Facebook, Instagram, and TikTok (@dprsd.streetwear). Be a part of a community that’s breaking barriers.

Heat Vinyl Custom Apparel: DIY NFL shirts

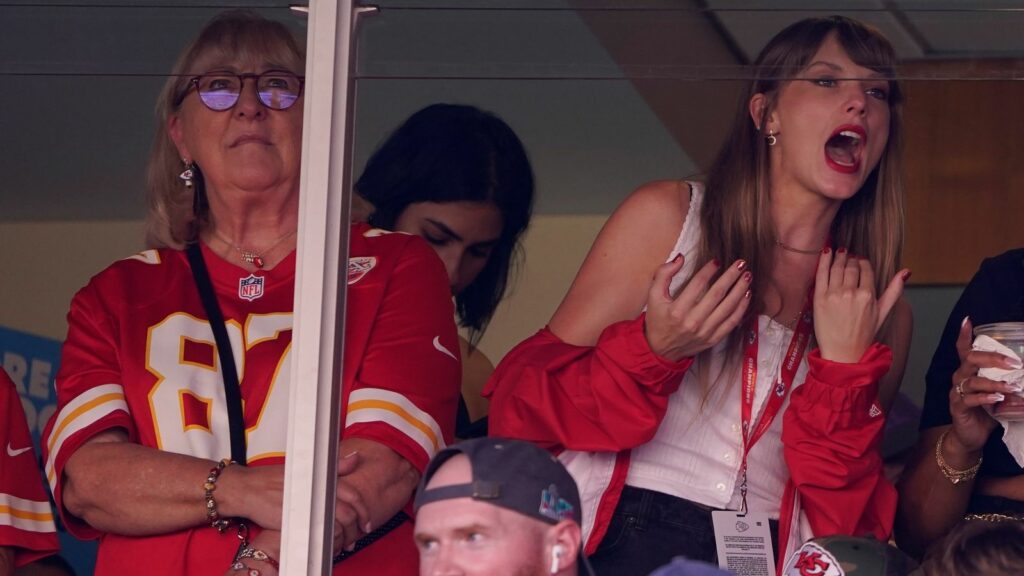
Taylor Swift, right, watches from a suite alongside Travis Kelce’s mother, Donna Kelce, inside Arrowhead Stadium during the first half of an NFL football game between the Chicago Bears and Kansas City Chiefs Sunday, Sept. 24, 2023, in Kansas City, Mo. (AP Photo/Ed Zurga)


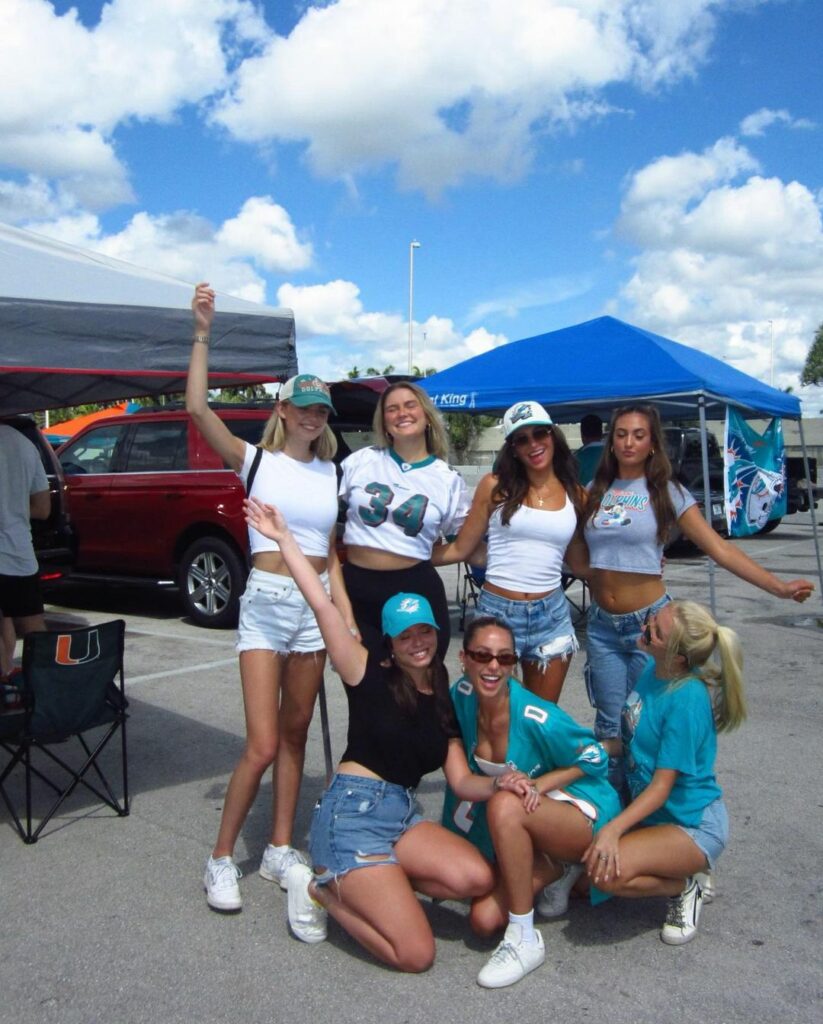
Are you ready to combine your passion for sports and music into one awesome DIY project? Have a tailgate coming up and you want to look stylish? In this article, we’ll show you how to create personalized NFL shirts using heat vinyl custom apparel. Inspired by the likes of Taylor Swift and Travis Kelce, and with a little help from popular influencer Alix Earl, you can design and wear your unique NFL fan gear that stands out in the crowd.

The Power of Personalization:

To begin, custom apparel has taken the fashion world by storm, and it’s no surprise why. The ability to design and create clothing that reflects your personality and interests is a game-changer. Heat vinyl custom apparel allows you to add your favorite NFL team’s logo, player’s name, or even your own unique designs to garments of your choice.

DIY NFL Shirts: A Celeb-Inspired Project:

Additionally, It’s not just about representing your favorite team anymore; it’s about doing it with style. If Taylor Swift can rock some Kanas City Merch, so should you!

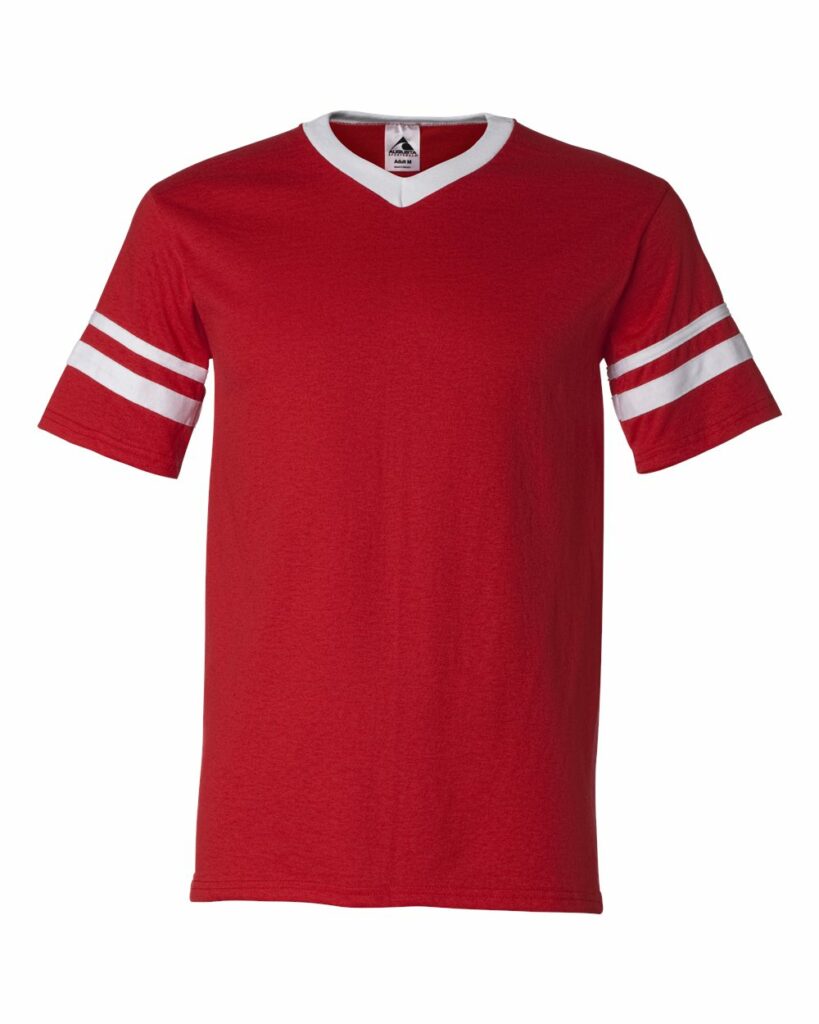
Taylor Swift’s Chic NFL Shirt: Taylor Swift is known for her fashion-forward style, and she’s been seen rocking an effortlessly chic NFL shirt. Create your own by choosing a Blankstyle blank shirt in your team’s colors and adding a sleek vinyl decal of your team’s logo or a trendy football-related phrase. For a style simmilar to to Kansas City’s jrsey, look no further than our Augusta Sportswear 360 Two Sleeve Stripe Jersey.

Influencer Alix Earl’s DIY Magic:
Popular influencer, Alix Earl, recently DIY’d an NFL jersey in a unique way. She has taken the heat vinyl custom apparel to the next level by cutting the jersey in half to create the look of a baseball jersey. While most people wouldn’t be thrilled about cutting up a $100+ NFL jersey- Blankstyle can help you re-create it! You can buy a similar looking Jersey and heat-press the decorations yourself! Our Augusta Sportswear 361 Youth V-Neck Football Tee is a good substitution.

Blankstyle: Your DIY Apparel Partner:

To continue and embark on your NFL shirt DIY journey, Blankstyle is your trusted partner. Choose from a wide selection of high-quality blank apparel, including t-shirts, hoodies, and more. Blankstyle’s products provide the perfect canvas for your creativity, allowing you to bring your NFL fan gear dreams to life.

Step-by-Step Guide:

  • Select Your Blank Apparel: Start by choosing a Blankstyle blank shirt or hoodie in your preferred style, color, and size.
  • Design Your Decal: Create or select your NFL team’s logo, player’s name, or any additional design.
  • Cut and Weed Vinyl: Using heat vinyl, cut out your design and excess vinyl, leaving only your chosen design. The excess vinyl is typically not clear- so it may show in your final design if not cleaned up.
  • Heat Transfer: Place your design on the jersey and use a heat press or iron to transfer the design onto the fabric.
  • Rock Your Unique NFL Shirt: Once your DIY masterpiece is complete, proudly wear your custom NFL shirt to the games, tailgates, or even concerts.


To conclude, Heat vinyl custom apparel offers a fantastic opportunity to express your passion for NFL football. Take a page from the fashion books of Taylor Swift and Travis Kelce, and get creative with DIY NFL shirts. Be sure to follow the innovative ideas and tutorials of influencer Alix Earl to make your custom apparel stand out. Start your DIY project today with Blankstyle’s top-quality blank apparel, and get ready to turn heads with your unique NFL fan gear.

Sublimation Apparel Printing: The Basics for 2022

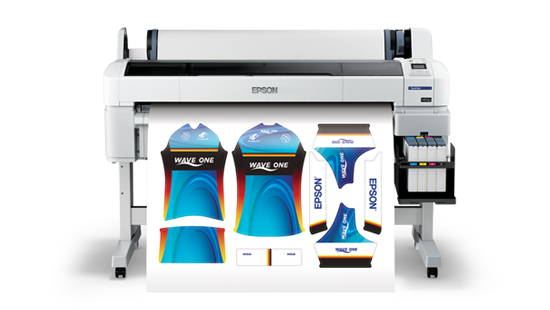
Epson-sure-color-sc-F6070

Sublimation Apparel printing:

Just when think you’ve covered all your printing bases — screenprinting, DTG — someone asks you about sublimation apparel printing. You might not know what it’s called, but you can’t walk into a retailer without seeing an example of it. It’s a printing method that provides all-over coverage, in full color.

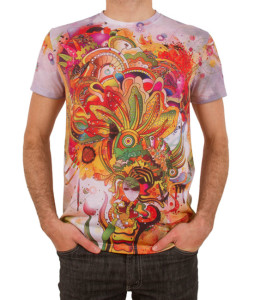
In a nutshell, sublimation printing uses heat to transfer the dyes onto the fabrics. There are two ways to do this: one is to print onto a transfer paper and then transfer the image to the fabric using heat and pressure. The second involves printing the image directly onto the fabric. But either way, you’re looking at transferring the dyes into the polyester molecules using a combination of time, temperature, and pressure. With dye sublimation, the result is a virtually permanent full-color high-resolution print that won’t crack, fade or peel under normal conditions. If you’re looking for color saturation, you’re looking for dye sublimation printing.

Unlike screen printing, where one color is added at a time, with sublimation printing, all colors are printed at the same time so there’s no risk of the colors not lining up or running. And as we may have mentioned, sublimation printing is the only way to go, if you’re trying to get that all-over printed look.

Image above: Epson SureColor® F6070

Jessica_Chastain_78

Offset vs. Digital Sublimation Printing

There are two types of sublimation apparel printing: Offset and Digital. The differences between the two can be simplified to a single word: volume. Offset sublimation requires a pretty hefty investment – the machinery alone can cost up to $1 million and you’re looking to do print runs of between 5,000 – 10,000. So if you don’t have a cool million hanging around, and you’re hoping for a print run under 500 pieces, then you’re looking at digital sublimation, which will give the saturated all-over print look, without having to invest quite as much capital.

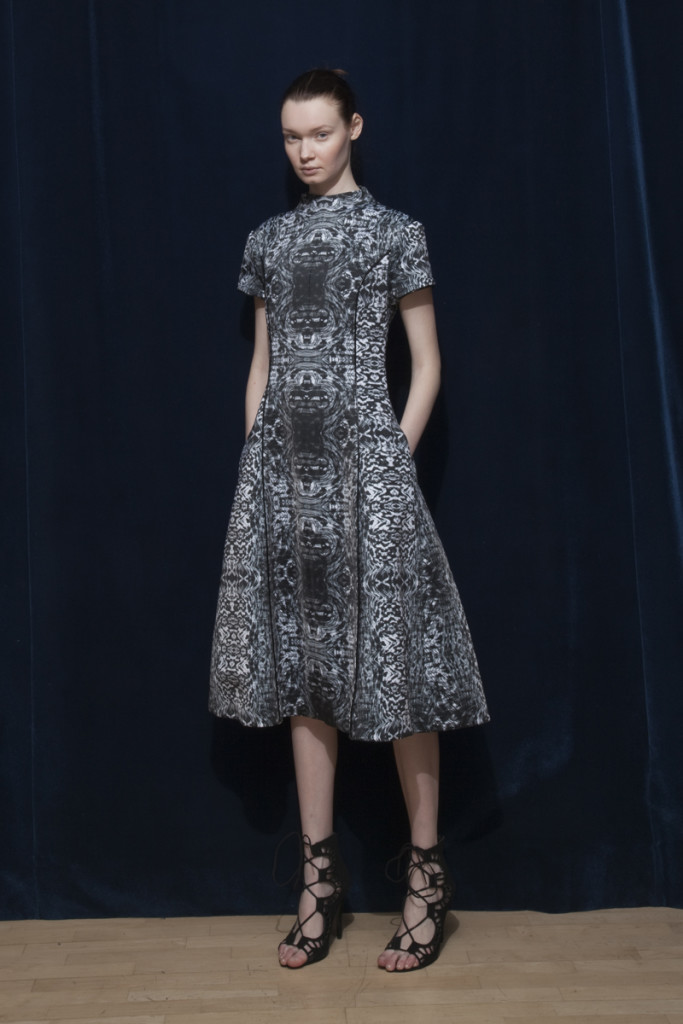
Image above: from Epson’s Digital Sublimation fashion show

1910 SubliVie Adult Polyester Sublimation T-Shirt Catalog

Image above: SubliVie 1910 Adult Polyester Sublimation T-Shirt is soft, lightweight, and is quite literally, made for sublimation.

Direct to Garment Printing (DTG) vs Sublimation

While both DTG and digital sublimation use inkjet printer technology, the processes and results are quite different. The first big difference you’ll notice between DTG and sublimation is going to be your garment choice. DTG is the choice for 100% cotton fabrics, while Sublimation only works on polyester garments (sublimation needs a polymer-based surface). Both processes will work on blended fabrics, but the result will be a little washed out and faded.

But that’s only the beginning. The entire chemistry behind the two processes is different. I’ll spare you the Chem 101, but basically, the DTG process is relying on surface adhesion, while with sublimation, there is actual molecular bonding taking place. (The dye actually begins as gas before becoming a solid!)

Sublimation Apparel Printing Perks

Blog3_BotanicalDs

  • You can print a highly detailed photographic image on nearly any polyester fabric.
  • You can print on textiles prior to the assembly of the garment for all-over coverage
  • Many polyester fabrics provide moisture-wicking capabilities making your garment perfect for high-performance sports ware.
  • There is no feel, which makes for a soft hand.
  • Perfect for full-color design on light textiles
  • Extensive color options

L1610 SubliVie Juniors Polyester Sublimation T-Shirt Catalog

Image above: SubliVie L1610 Juniors Polyester Sublimation T-Shirt is perfect for sublimation apparel printing

When you’re ready to take a leap into the world of sublimation apparel printing, check out our sublimation apparel category. If you don’t see what you are looking for, let us know. And we’ll help you get started on your sublimation journey!

Custom Shirt Tags: Creating Your Own Neck Label

You have a brand. You need custom shirt tags. When it comes to creating your own clothing line, finding the right type of tag can be a long process. Adding a personalized printed label on the inside neck of your tees is the hottest trend in retail, and luckily it’s a cheap alternative to sewn-in tags, woven labels, and hang tags! There are many reasons why creating your own custom printed tagless label can be the perfect option for your apparel brand. Removing the original manufacturer tags and replacing them with your own one-color print design is an awesome way to really show up the competition and make your t-shirts look as professional as possible.

custom neck label shirt tags


Why should I print my t shirt label instead of using sewn in woven tags?

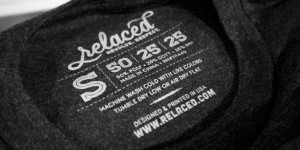
Branding your garments will show customers that your line is the real deal, while also providing a more comfortable wear. We’ve all been there—when you’re wearing a new t-shirt for the first time, and next thing you know that itchy, scratchy tag is totally throwing off your whole day! That’s Branded custom neck labelnever the impression you want to make. With a printed label, your customers won’t ever have to fuss and fight. And with a bigger surface area than standard woven tags, you’ll have more freedom to really use the label as branding opportunity. Screen-printed custom shirt tags offer more room for artistic design that will have a presence on the garment—catching the eye of shoppers and leaving an impression about the identity of your brand. Custom garment labels also help to keep your t shirt line cohesive across different items, styles and colors. There’s no better way to legitimize your line and keep up with big brand names than to order your own custom screen printed labels!
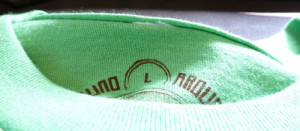
What do I need to include on my custom neck label?

Okay, so where do you start? The first thing you’ll want to include in your custom shirt tags is the legally-mandated information regarding country of origin, fabric content, care instructions and size of the blank shirts you’re using. In the US, the Federal Trade Commission (FTC) requires that this information be included on all clothing before it is sold. Because of this, the shirts that you choose will already have a tag which will need to be removed. Visit the FTC website if you’d like to learn more about these labeling requirements! When choosing your t-shirts, you’ll need to make sure that the shirts have either sewn-in tags or a tear-away tag—not a printed or heat-sealed label. In order to print your label, we’ll need a clean surface!

Example of sewn-in tag residue when adding custom neck labelHow do you remove the existing garment tags?
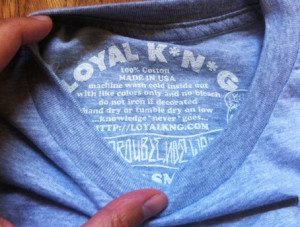
Removing the manufacturer tags is no problem for us—we offer this service at no additional cost! Tees that feature tear-away or “paper” tags are the best option for achieving the cleanest finish, since these were created especially for this purpose. Brands like Next Level, Delta Apparel, Anvil and Tultex offer various tees with this kind of label—making removal quick and clean.

Sewn-in tags are also easy to remove—we simply snip off the tag as close to the seam as possible. Depending on the type of shirt, some tags are a little more difficult to remove entirely. Small amounts of leftover material, referred to as “residue,” should be expected when looking closely, but generally shouldn’t be visible when the collar is lying flat.

How do I start designing my custom shirt tags?

Once we’ve got the tags removed we’re all set to print your inside neck labels! When designing, there are a few things to consider. In order to create the most lightweight print with a barely-there feel, you’ll want to incorporate a lot of negative space into your design—meaning that you don’t want too many large, filled-in spaces. Think outlines and light fonts. Remember: the Inside Neck Label Custom Shirt Tagmore ink there is in your print, the more you will feel it!  Besides, you don’t want your label to distract from the rest of your shirt!

When it comes to printing dark colors onto light colored tees, it’s possible that your print may show through the back of the shirt a little bit, depending on the weight and fabric content. This is another one of those anomalies that is unfortunately unavoidable with screen printing. Generally speaking, using heavier weight tees and lighter colored ink will help to avoid this. Also, be advised that you’ll be able to feel the print a little more on darker-colored shirts than you will on lighter-colored shirts. This is because 2 layers of ink will be needed when printing onto dark fabric. If you have any concerns, speak with one of our representatives prior to ordering and we can go over t-shirt options!

Chelsey on Google+

What is Screen Printing? What You Need to Know in 2022

What is screen printing? As you might guess, given the obvious hint built into the name, screen printing is a printmaking technique where stencils are laid over a screen. That screen is usually made of cotton, nylon, or metal. The printing ink is then pushed through the screen using a rubber squeegee. That’s the simplified version, but every little step can involve lots of decisions from what ink to use to the best squeegee.

OLYMPUS DIGITAL CAMERA
Image above: a screen printing class at the Alexandria Museum of Art

Just a little history
The basic process is thought to have been invented in China and then refined in Japan (makers of good things like karaoke, the novel, and instant ramen). After 1915, when it became possible to photo-screen print (introducing photo stencils), the technique took off in the commercial sector in the United States. Grocery stores and other shops needed quickly produced locally made signs to advertise sales, and screen printers were able to underbid sign painters and win jobs. For years, those screen printing techniques were closely guarded trade secrets. Then in the 1960s, the technique took off in the art world amongst pop artists like Andy Warhol, Roy Lichtenstein, and Richard Hamilton. From there, screen printing entered the mainstream. These days, screen printing has been enthusiastically adopted by the DIY community.  And now that the information for how to set up a screen printing studio is so readily available online – anyone, with an idea,  can screen print.

diy-print-shop-screenprinting-kit
Image above: DIY Print Shop

Screen printing Setups
One of the reasons that screen printing is so popular is that it is infinitely scalable. You can create a setup for under $40 or spend $40,000. Every setup might be a little different, but the basic elements are a screen, emulsion, artwork, a squeegee, ink, a light source, and a water source. If you’re eager to get your hands dirty, this is a great screen printing guide from one of our favorite reads, LifeHacker. (But if you’d rather us do the dirty work, we’re happy to mess around with the ink for you.)

40312-group3ww-l
Image above: jacquard screen printing inks
Decision, Decisions, Decisions aka Screen Printing Ink

Underbase
The first consideration in design is often the underbase. One of the most important choices in determining how your design turns out, regardless of the ink type is whether or not an underbase is used. Think of an underbase like a primer coat. if you wanted to paint a red wall blue you would first prime the wall with a neutral color like gray or white, You would then paint blue over the primer. If you were to paint blue over the red wall without priming you would end up with a purple not a blue.Underbase

Underbasing in t-shirt printing, much like priming in painting is a great way to ensure your design ends up being the color you intended it to be. An underbase is essentially the entirety of your design printed in neutral ink. In this way regardless of the garment color or makeup the colors in your finished design should remain consistent. This is especially true when printing bright colors over darker colors. This is also true when your intention is to have a consistent-looking design printed on different material makeups and colors. There are a few negatives to consider when choosing to underbase. Because there is an additional underlay or undercoat of ink, the design will feel thicker to the touch. In addition, underbasing requires additional screens adding cost. Printers typically charge around $30 to $40 dollars per screen.

In a nutshell, if you are printing on lighter uniformly colored garments and the most important component of your finished design is its soft feel where color consistency takes a back seat, you should not be underbasing however if you are printing on dark or various colored garments and need a consistent design color where soft feel is the less important of the two, you should be underbasing. Often times printers will help you make this decision based on the garments you’ve chosen and the colors in your design.

Ink types
Once you’ve decided on your shirt (and that’s a whole other conversation), the most important consideration is going to be your ink.

The traditional ink is plastisol ink. This creates a thick print that rests on top of the shirt. Plastisol inks can provide a higher contrast than water-based ink, and if you’d like your fwd_traditional_printingprinted design to appear bright and color accurate, then a plastisol ink can give you that effect. Plastisol ink is a good choice if you’re printing sporting goods, nylon, or dark-colored clothing. Plastisol ink is also the most consistTower-Tee1ent choice when printing the same design on different garment styles and or colors.

If you’re looking to make a super soft shirt then water-based ink is where it’s at. Whereas the plastisol ink rests on top of the shirt, water-based ink is actually directly dying, or in the case of discharge, bleaching the fabric’s fibers, which means that the printed portion of the shirt will remain softer than plastisol the print further softens to almost a no feel with one washing.  An added plus is that water-based ink is eco-friendly. Water-based inks don’t have that same high contrast that plastisol inks have so the effect often feels vintage. Waterbase ink typically work out best when the design has a limited color spectrum as water base inks are not vibrant like plastisol inks. Creative designers typically use the garment color to bring out accents in the design.

But there is a middle ground between plastisol and water-based – soft plastisol or soft-hand plastisol gives you the contrast of a plastisol ink but is much softer than the straight-up plastisol ink. Soft hand plastisol is accomplished by using thinning agents and high mesh count screens minimizing and thinning the amount of ink allowed to pass through the screen to the garment.

But what if you want a more custom look? There are an infinite number of special effects inks. Here are a few of our favorites and the ones that we print with here at Blankstyle.com.

Puff ink is the screen printer’s version of that ‘80s craft favorite – puff paint. Puff ink is created by mixing an additive with the plastisol inks so that your ink will puff up after it dries giving your design a textured effect. (We like to use it to give your designs a faux stitching effect.)

So that’s the quick run-down on what screen printing is and how it’s done. Of course, the more you dig around, the more questions you might have. We’re here to help with any of those.

And if you prefer to get your information the old-fashioned way, here are some great resources:
Print Liberation: The Screen Printing Primer
Simple Screenprinting: Basic Techniques & Creative Projects
ulled: A Catalog of Screen Printing (great for inspiration)


Amy on Google+

What is DTG Printing: When, Why, and How in 2022

What is DTG Printing? Short for Direct-to-Garment, DTG printing is a method of printing designs directly onto t-shirts and textiles using a modified ink printer.

Custom DTG Printing

Brother DTG Printer

Direct to Garment printing is a direct descendant of inkjet printing. That means no screens, no mess, no thick plastisol ink–yet great detail and stunning color possibilities. How it works is a t-shirt is loaded onto the machine, and your design is printed directly onto the shirt using specially formulated water-based inks. The design is then heat set using either a heat press or a tunnel dryer. In the same way that your inkjet printer can print extremely detailed images, a DTG printer is able to produce photo-quality images on shirts that still have a soft feel.

Custom DTG Printing

No color limitations with DTG Printing means you can print what you want without the price going up. Photo courtesy of Behind the Blank

Sounds great, right? Well, Direct to Garment printing does have its limitations. Specialized ink means it’ll end up costing a little more. It’s also a lot slower than screen printing (think of standing in front of an inkjet printer and waiting for a piece of paper to come out), so labor costs are higher as well. And the printable area is a little smaller, too.

So with so many factors to consider, the real question is when to use Direct to Garment and when to screen print. The basic formula is if you’re printing a multi-colored and detailed design with less than 50 shirts, Direct to Garment is the more efficient and cost-effective choice. Once you start hitting quantities over 50, then screen printing becomes the faster and cheaper option. DTG is also the go-to option if you’re looking to print a photo-realistic image.

Custom DTG Printing

Print your illustrations right onto a shirt with DTG Printing

When printing DTG, the fabric content of the garment is by far going to be the main factor to consider when choosing which shirts to use. Lots of printers insist on going with only 100% cotton (like the Cotton Heritage MC1040 and the gildan 5000 ). We recommend going a step further and choosing ringspun cotton (like the Next Level 3600 or Tultex 290), which is much softer and smoother–and thus prints better. You could also choose an organic cotton shirt, which is great for marketing.

In general, screen printing is going to be a better choice for blended t-shirts if you’re looking for vibrant colors. This is because DTG Inks are best absorbed by 100% cotton, and the color won’t take as well to man-made fibers. However, if you’re looking for more of a subdued print with vintage-style faded colors, DTG could be the perfect choice for your design. White blended shirts print very well, but if you’re using anything other than that we suggest consulting with one of our print reps to be sure there won’t be any issues.

Next step–generating your custom DTG print quoteblankstyle.com is your one-stop shop for all of your blank and printed apparel needs!

Amy on Google+